


This one is about turning around a disaster.
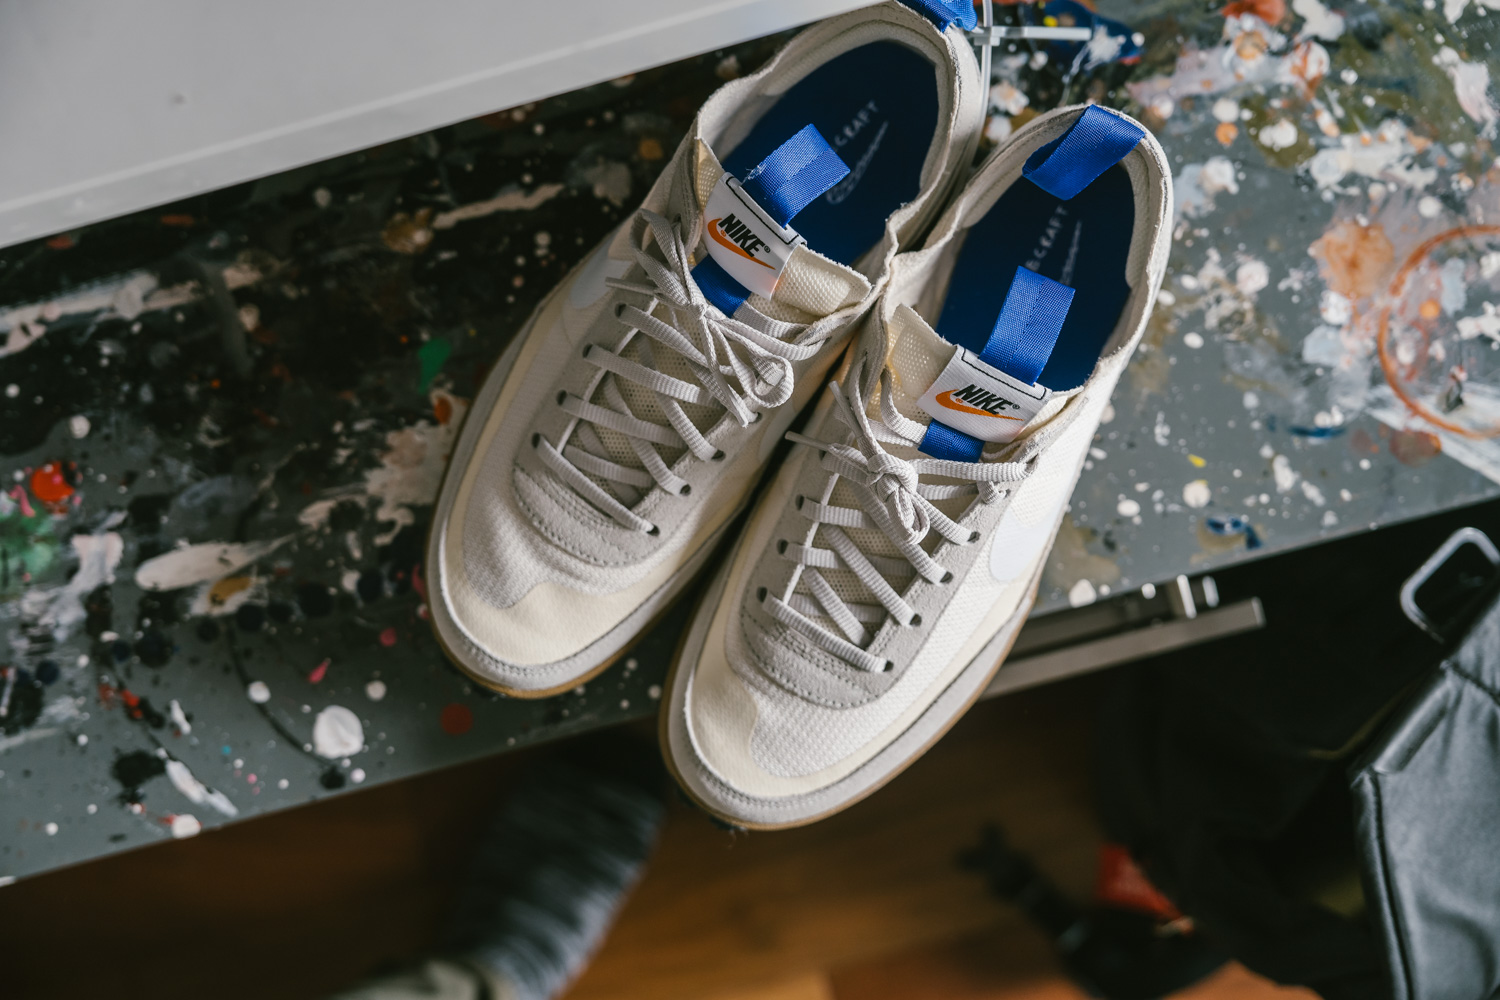
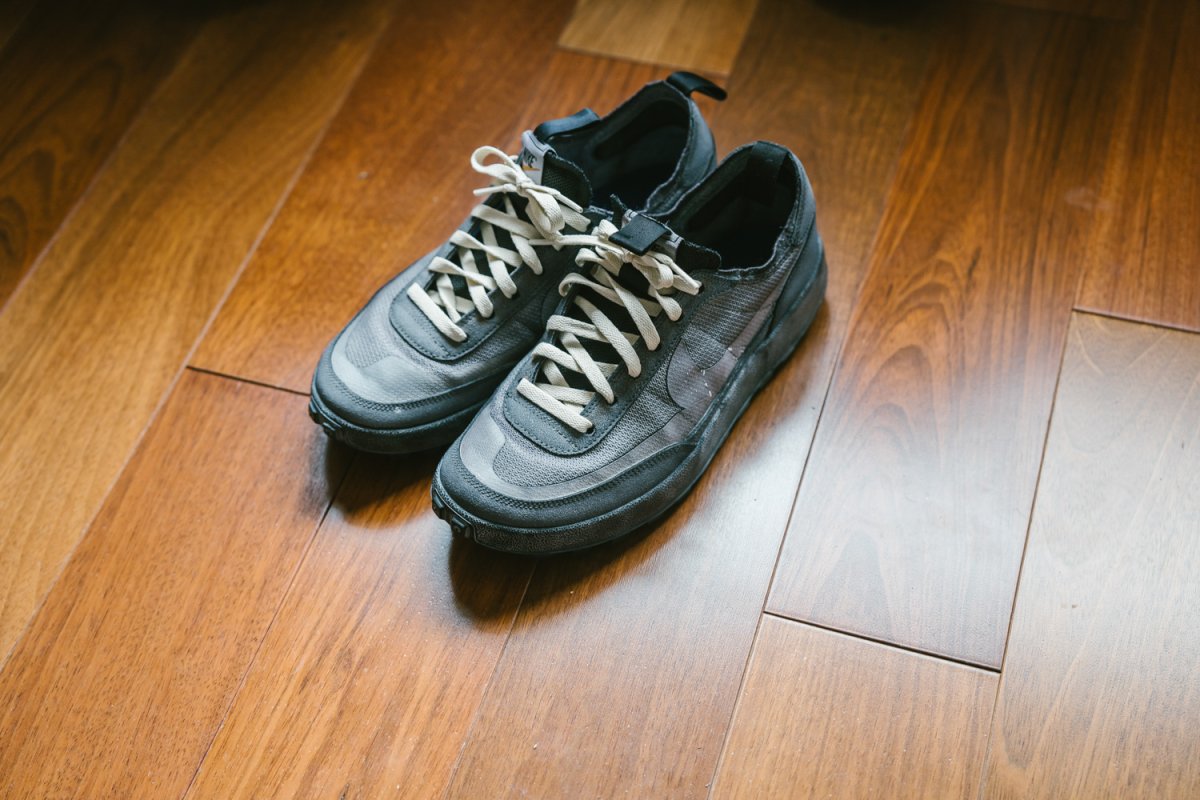
I bought a pair of Tom Sachs General Purpose Shoes (GPS) in the studio colorway — a beautiful, understated pair of kicks. But to me, the color felt a little too light. I’ve always preferred darker tones. And while time and wear would naturally darken them, I’m impatient.
And since I’m a big believer in customizing everything, I decided to take matters into my own hands. I came across a post showing an indigo-dyed pair and thought I’d give dyeing a try. Instead of blue, though, I wanted something closer to athletic grey — warm, muted, and lived-in.
The result? Not quite what I had in mind.

The Tools
Below are the tools for the job.
⚠️ Disclaimer: This was my first attempt. The final look may have resulted from a few miscalculations, so I can’t guarantee that following these steps will yield the same result. But here’s exactly what I did.
This customization went through a few distinct phases. I’m sharing them all so you can grab the bits and pieces you like from each phase and apply them to your own customs.
Phase 1.
Minor Cosmetic Custom
Before even considering a more ambitious custom like altering the color of the whole shoe, I started small. Just to give the pair a bit more personality.
I like the silhouette of the general purpose shoes, but I thought they felt a bit flat.
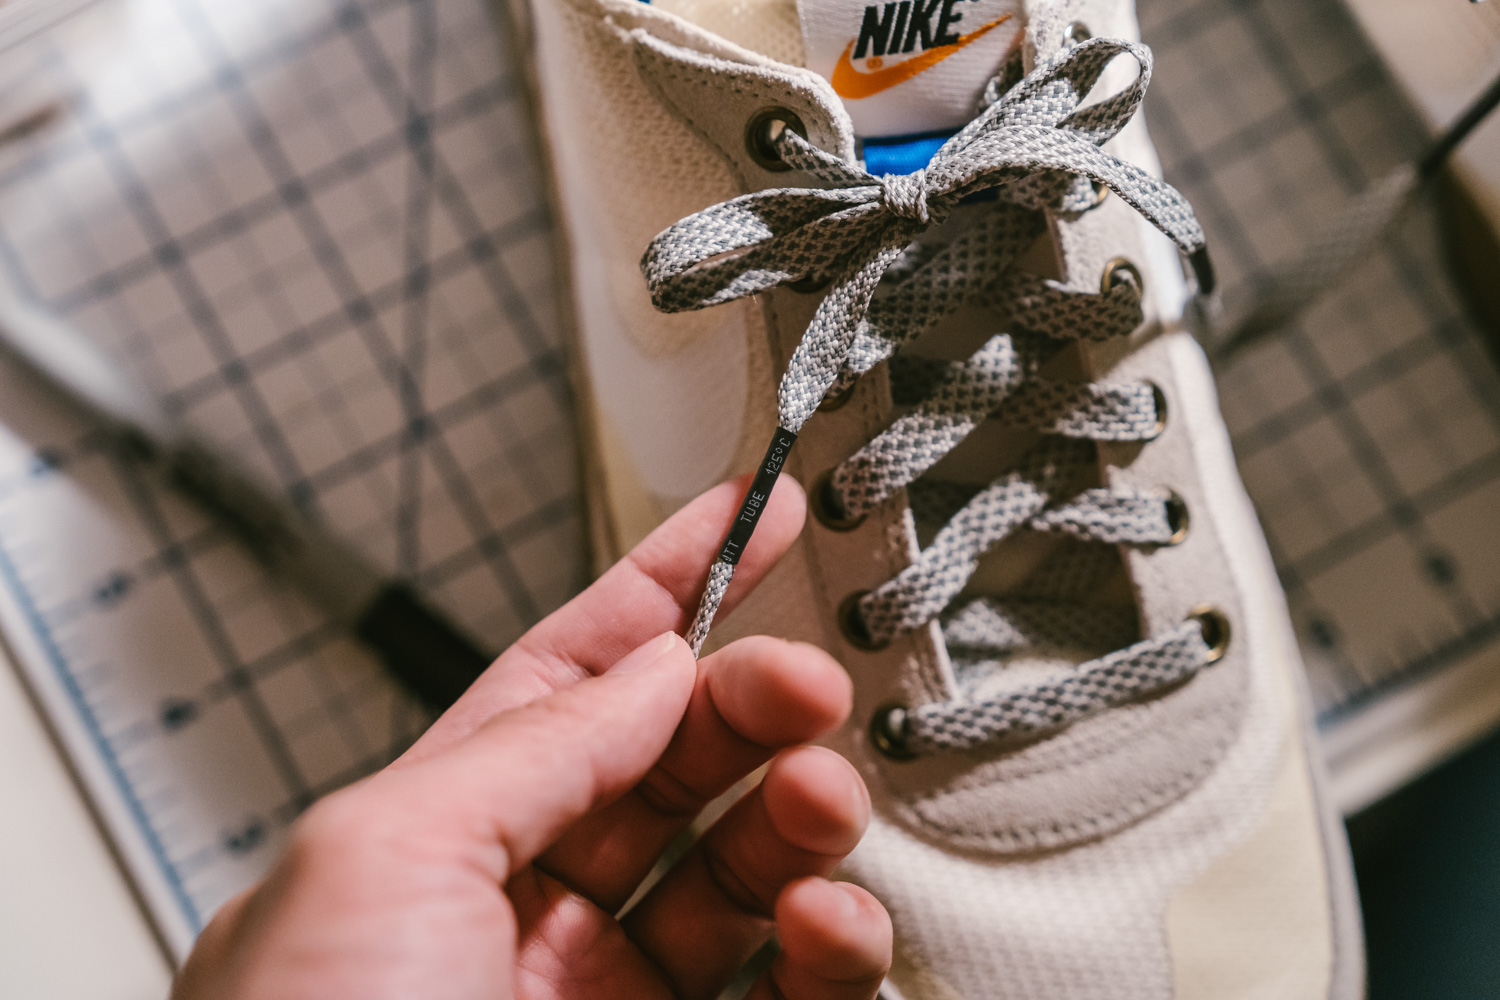
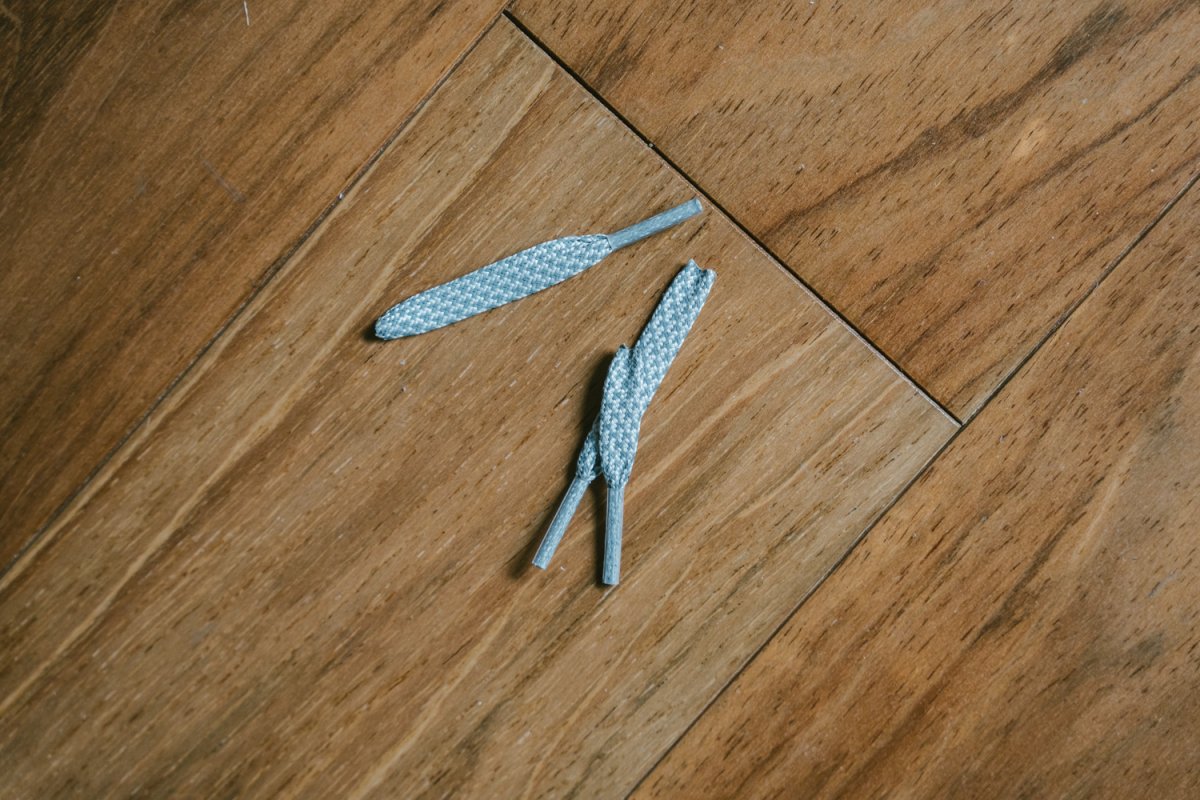
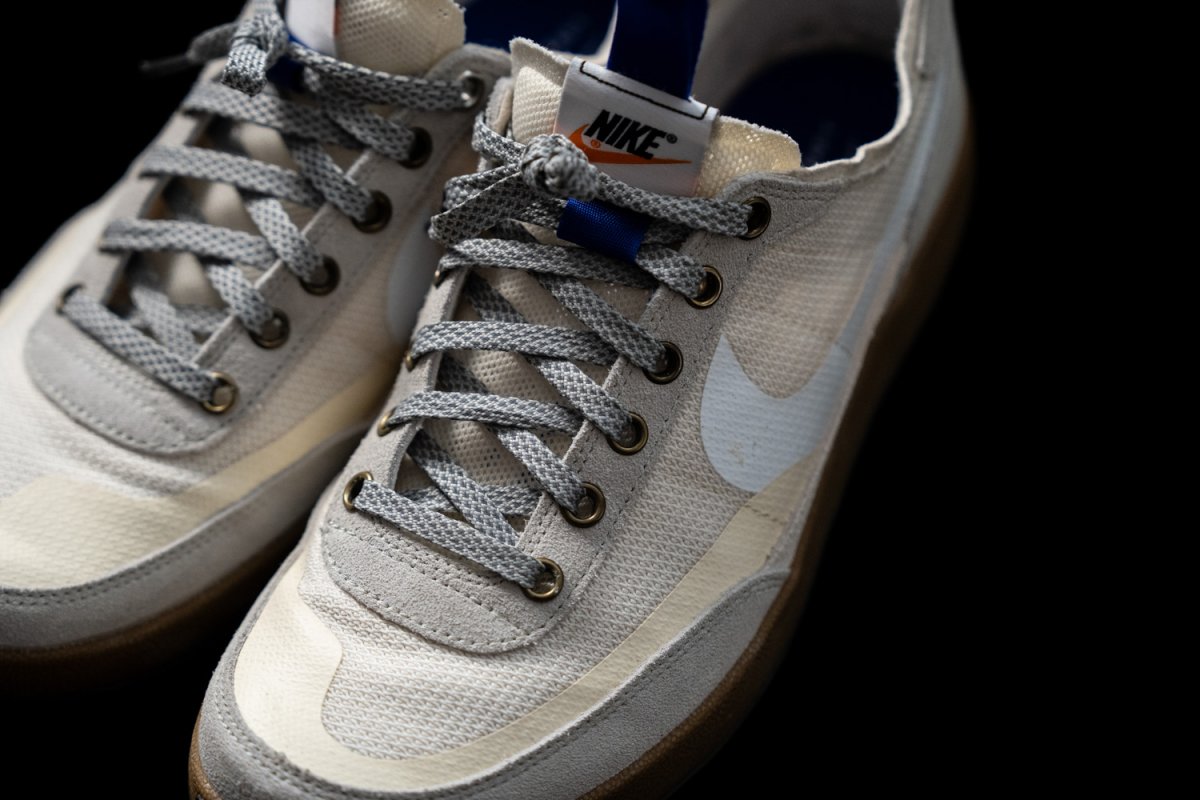
Laces
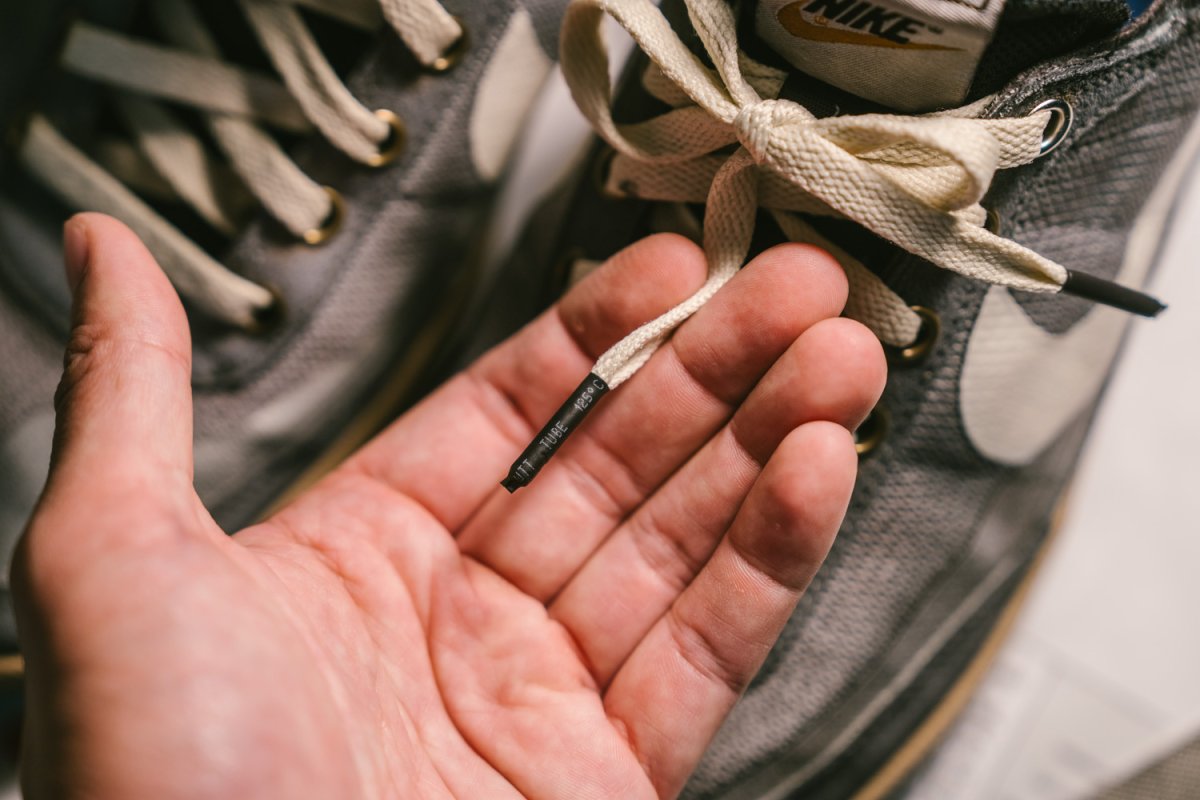
I swapped the stock laces for a patterned grey pair. They were too long, so I trimmed them and sealed the ends with hot glue and shrink tubes. It was meant to be purely functional, but I actually ended up loving the look. (You’ll see this detail return later in Phase 4.)
Grommets
I added grommets to the eyelets. This one’s purely visual. I debated between silver, black, and antique brass — eventually choosing antique brass for a subtle retro touch. The accent gives the shoe a bit more depth. Some grommets may not be long enough to clamp through the eyelets, in which case super glue may be your best bet.
Sole detail
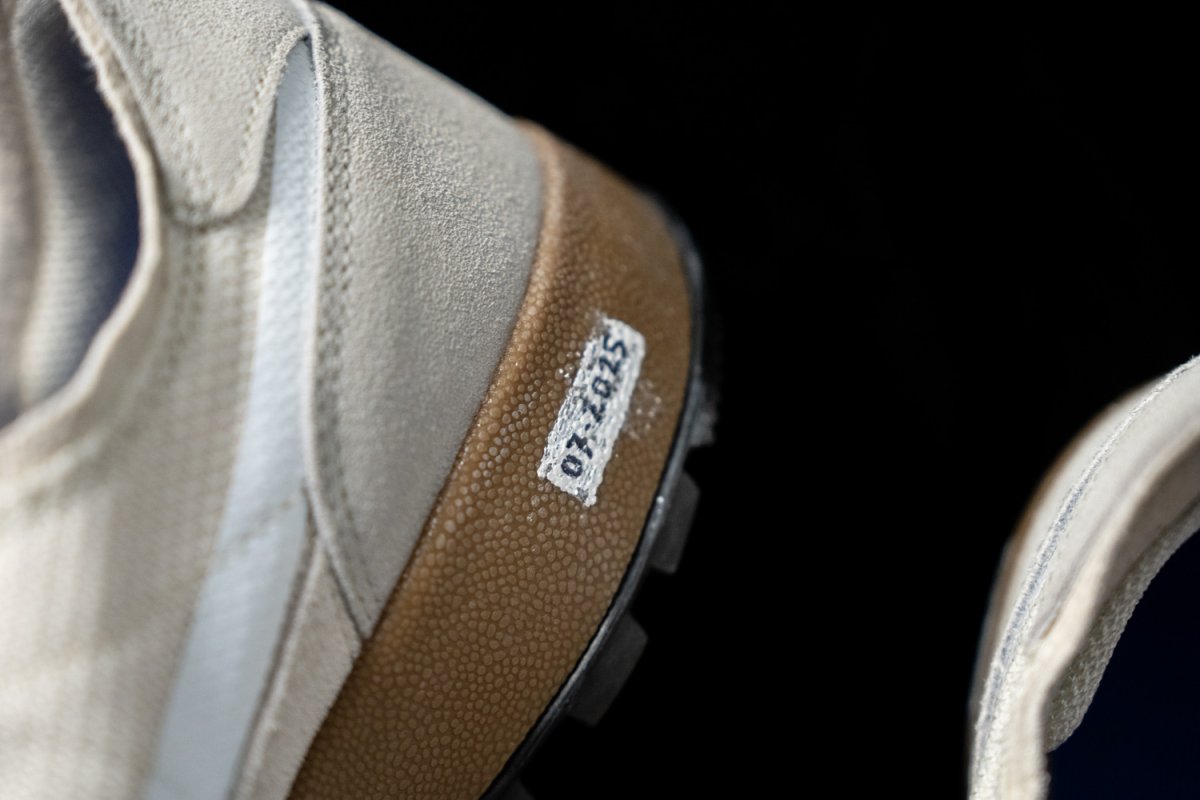
I used white-out to add the date to the sole. I don’t recommend it — it rubbed off almost immediately.
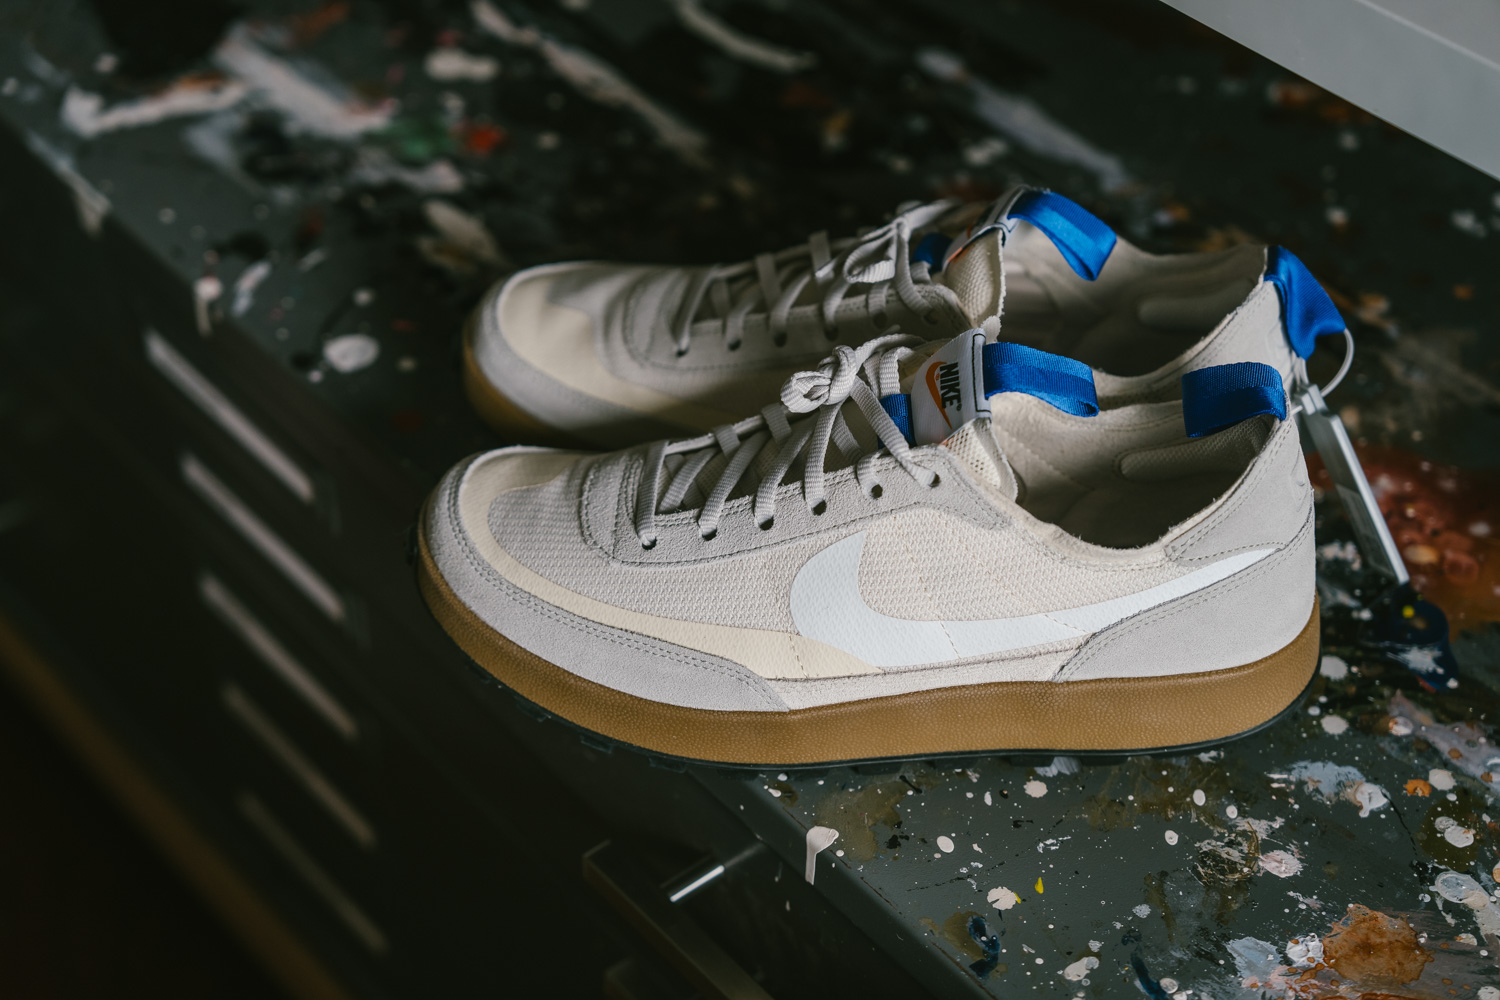
The final look from phase 1
A more personal version of the GPS. Subtle, but already felt like mine.
Perhaps I should’ve stopped here. But nooo, I ventured forward.
Phase 2.
Light Grey Dye Bath
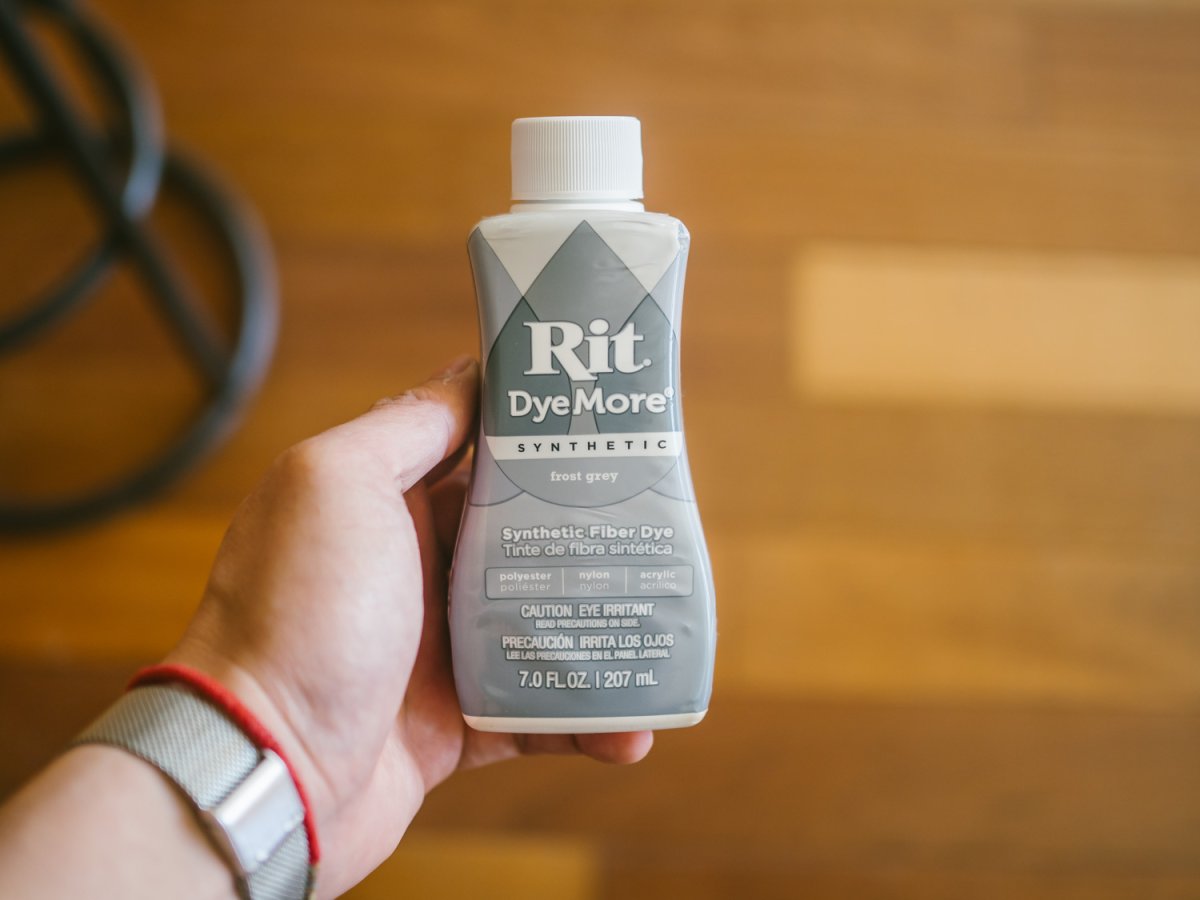
The more I wore them, the more I wanted a darker tone. There weren’t many GPS dye customs online (partly why I decided to share mine), but I loved what Reddit user u/toastontoastontoast did with an indigo dip. Inspired by that, I tried a similar process. Except I used Frost Grey.
Here’s how I did it:
Find a pot that can fit both shoes and be placed on the stove top. I didn’t have anything big enough and didn’t want to risk using any pot that I’d eat out of. So I bought a set of galvanized tubs.
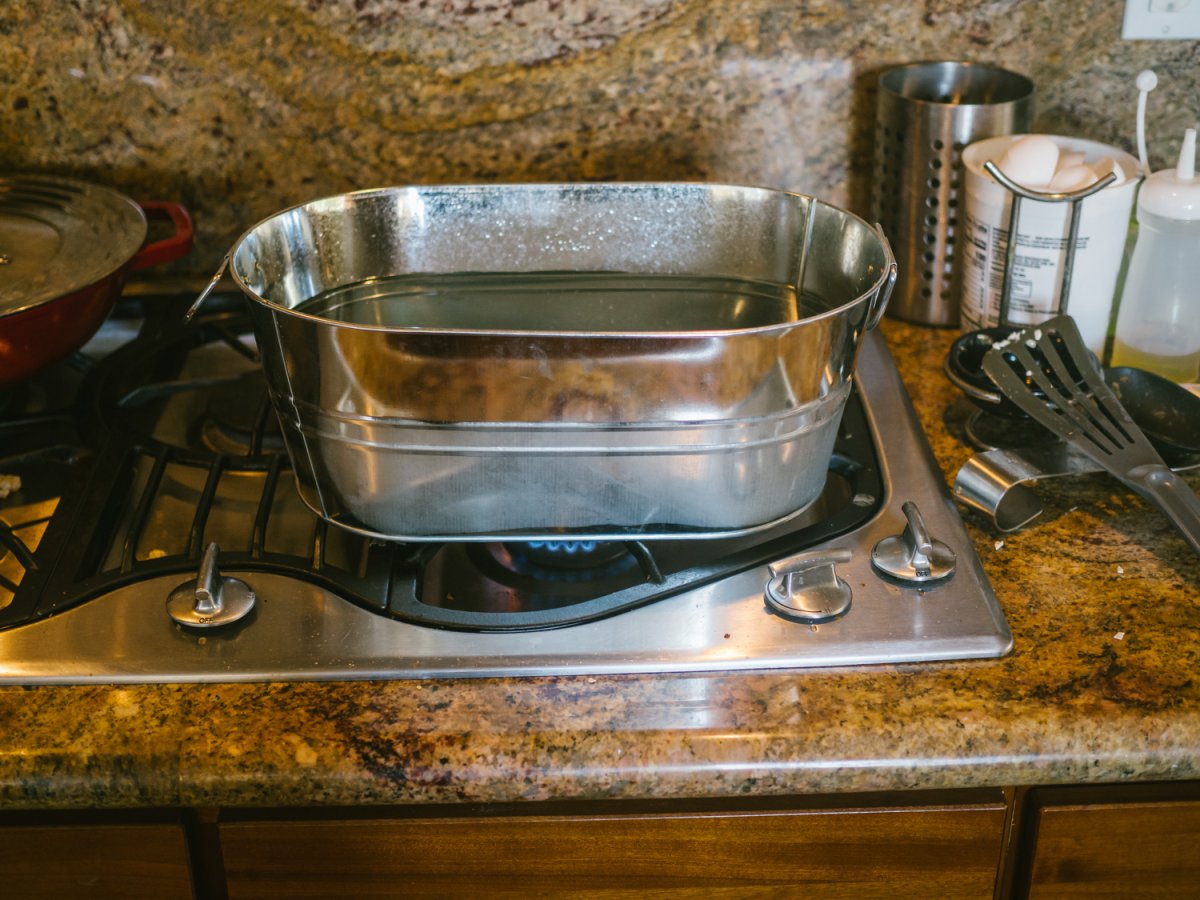
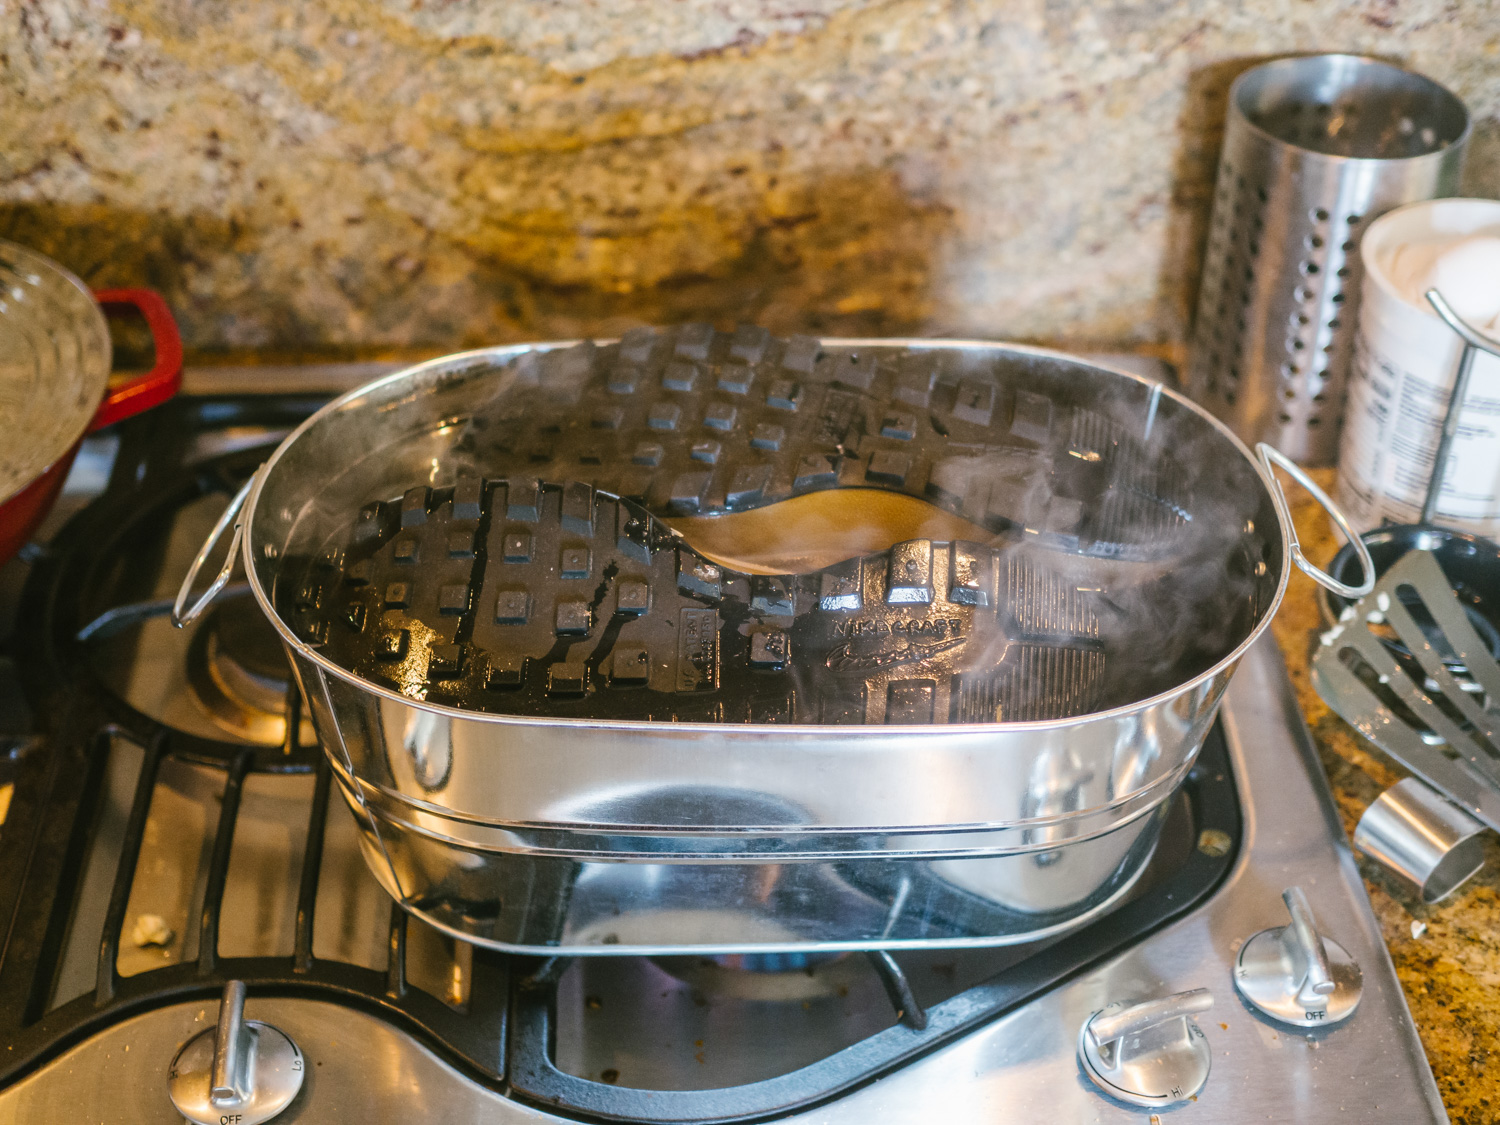
Submerge the shoes, and heat until nearly boiling.
Submerge shoes for 15 minutes, stirring occasionally for even coverage.
Turn the heat down — aim for around 160°F (71°C).
Mix in 3 gallons of water and one full bottle of Rit Dye.
The first mishap.
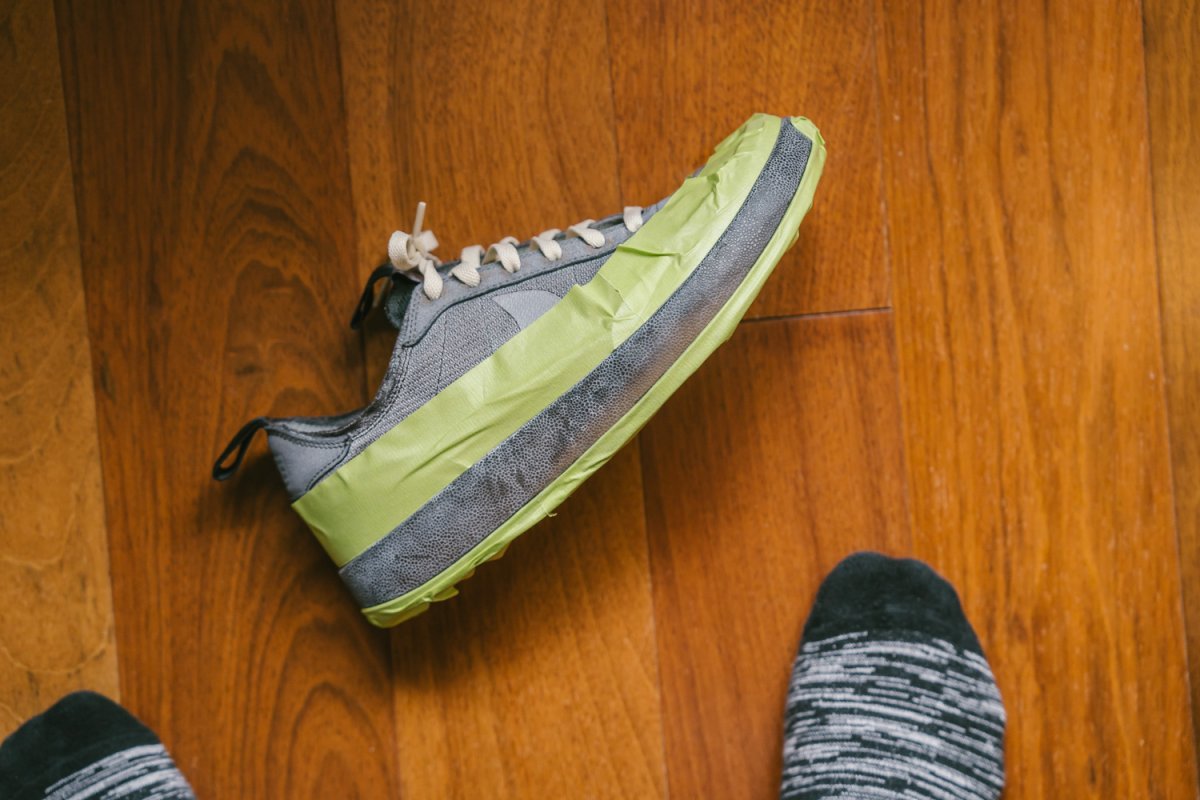
I chose the wrong shade of grey. The result was too blue and too light. (it looked nothing like the dye packaging, which is always a good practice to test dye.)
But I noticed something interesting: the protective coating on the upper didn’t take the dye, leaving a contrasting white accent that looked surprisingly good. The gum sole also absorbed a bit of color, but it wasn’t too noticeable.
⚠️ Note for future projects
Taping the sole: Always tape the soles before dyeing. Unless you intend to dye the sole, too. Repainting them is tedious, and I still haven’t found the perfect permanent fix.
Phase 3.
Dark Grey Dye Bath
This is where things reallly gone to crap.
Since the Phase 2 result came out too light, I decided to give the dye bath another go. Now with a darker shade of grey. Graphite.
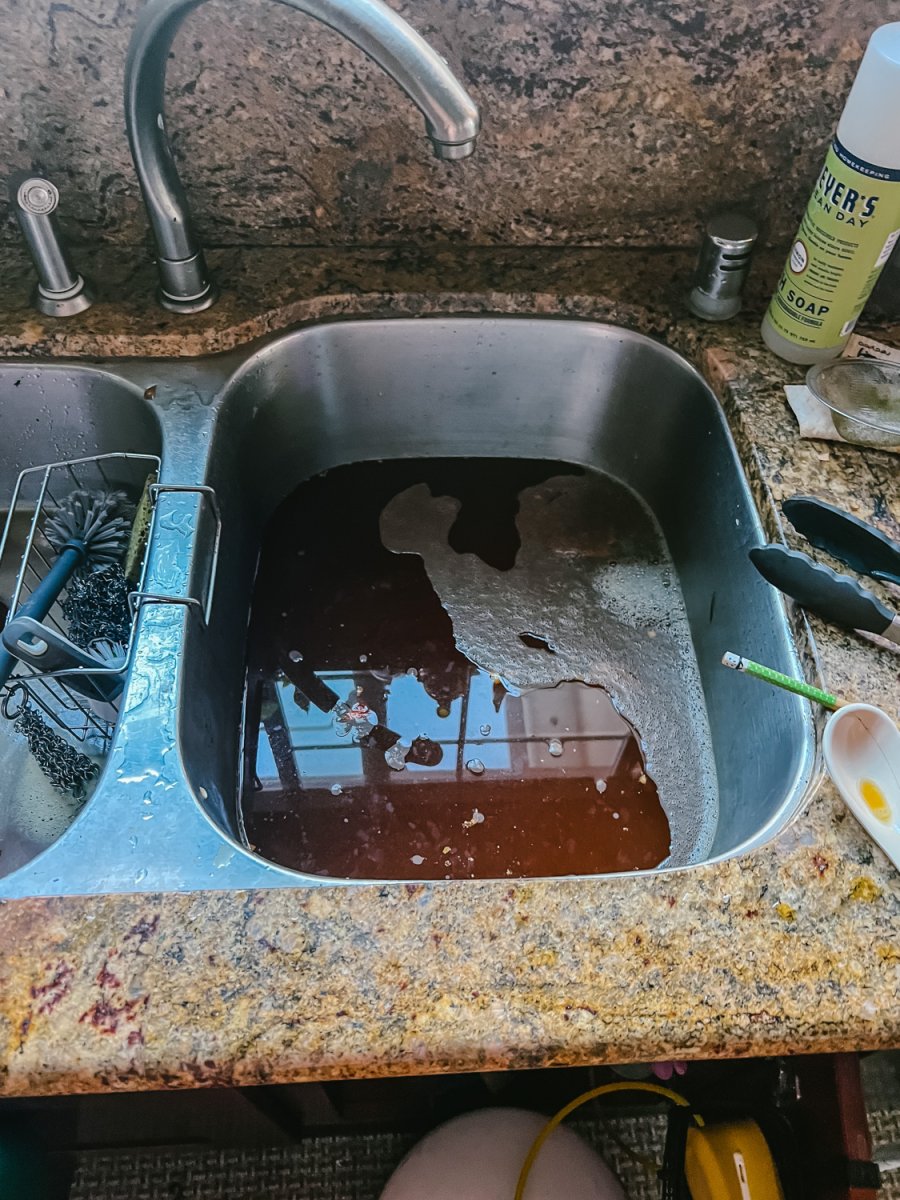
Before re-dyeing, I used dye remover to strip the first attempt. It worked… but also introduced a new problem.
Apparently, the remover caused a chemical reaction with the glue in the shoe, producing neon green ooze (yes, really) and completely stripping off the protective coating.
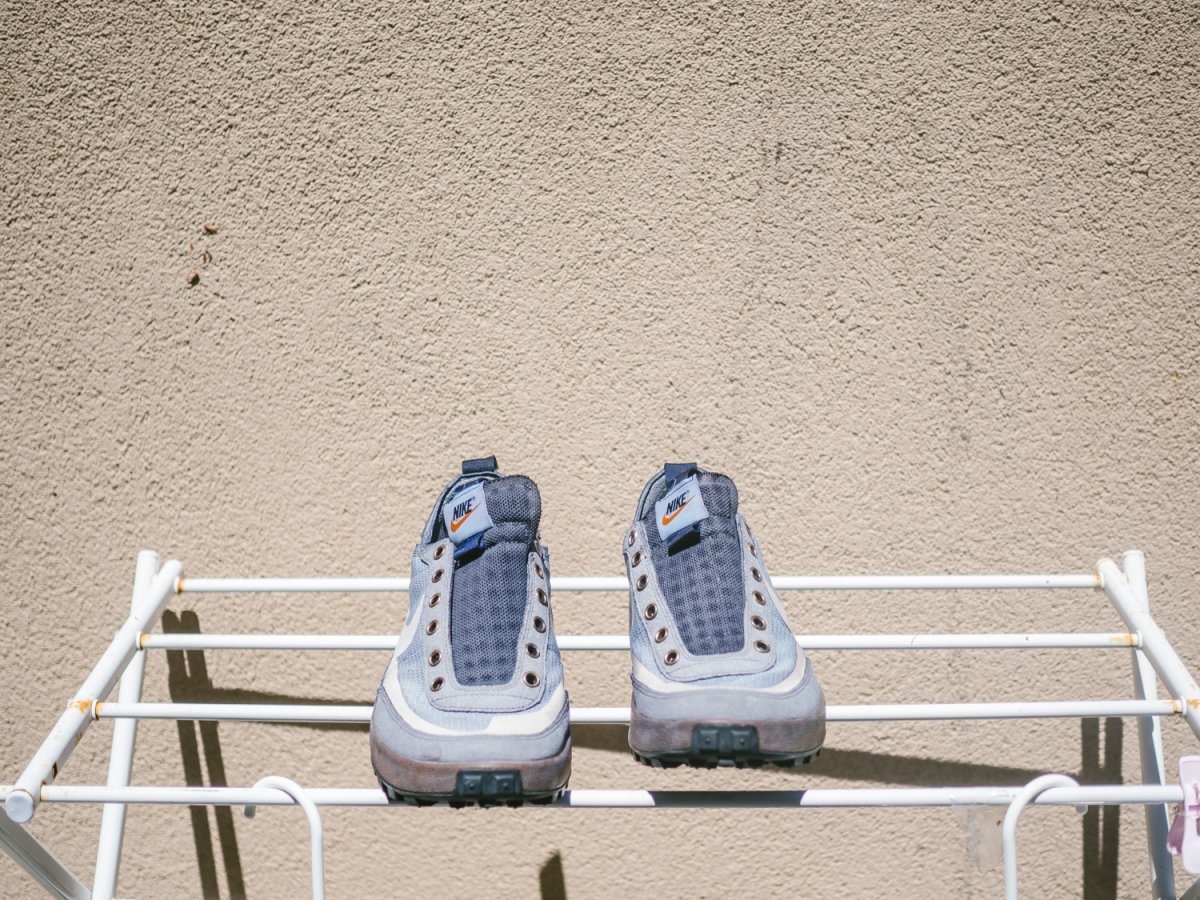
That meant my second dye bath colored everything.
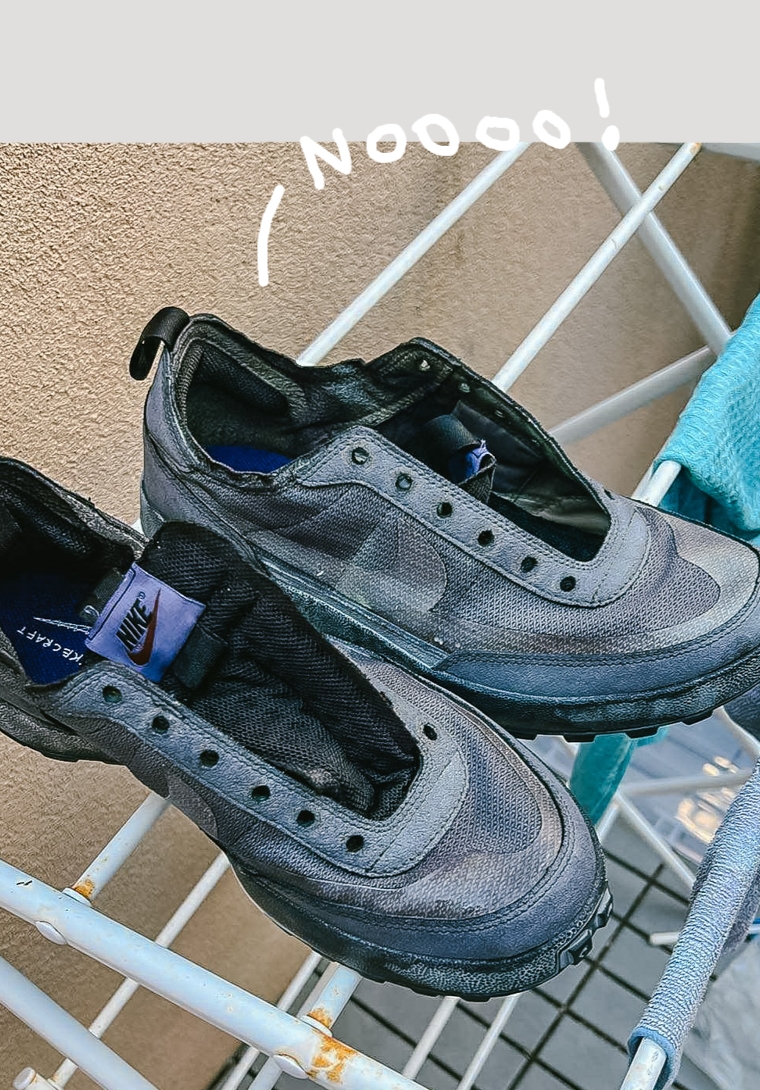
The swoosh, sole, lining, even the once-white accents — all turned into a dull, bluish-grey. Not even the grey I wanted. I was gutted. It looked terrible, and I felt like I’d just flushed $170 down the drain. F. 🤢
I added the cream laces for contrast, which helped marginally. But yea, still poop.

⚠️ Note for future projects
Dye Mixing: Learn to mix dyes beforehand for better color accuracy — this guide would’ve helped.
Phase 4.
The Remedy
At this point, the shoes looked horrendous — dark blue, dirty, and still leaking green near the seams. I was ready to chaulk this up as an L. But since I’d already gone this far, I figured I might as well try to make something of it.
If it’s already rock bottom, there’s nowhere to go but up.
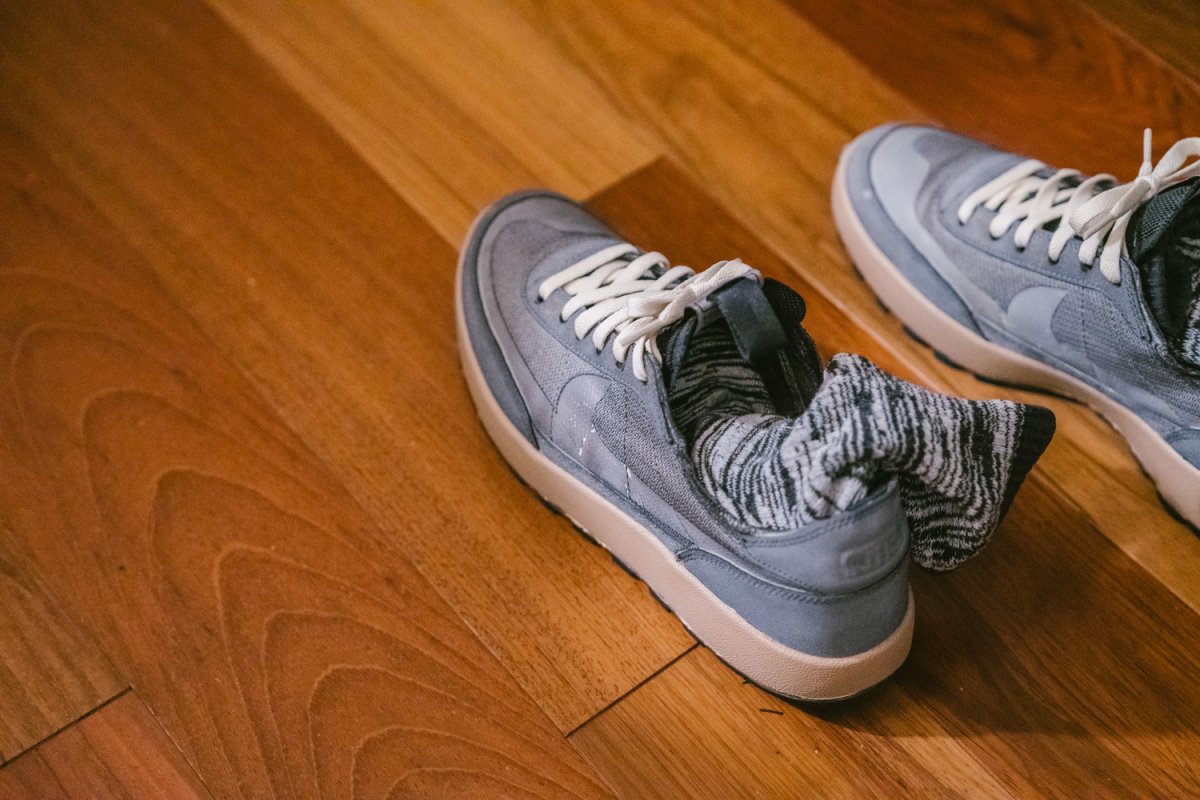
The shoes shrank
The multiple near-boiling dye baths actually caused the shoes to shrink slightly—about half a size at first. After a few wears, though, they expanded back close to their original fit, maybe just a quarter size smaller.
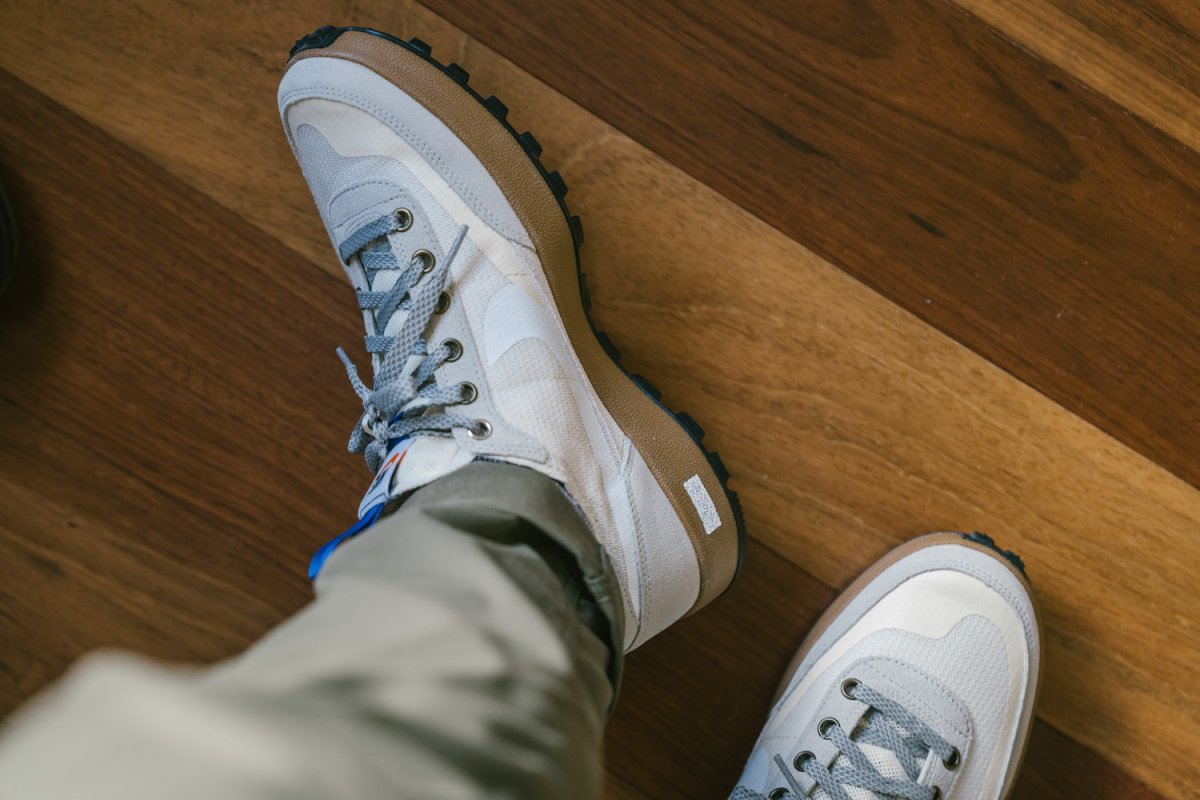
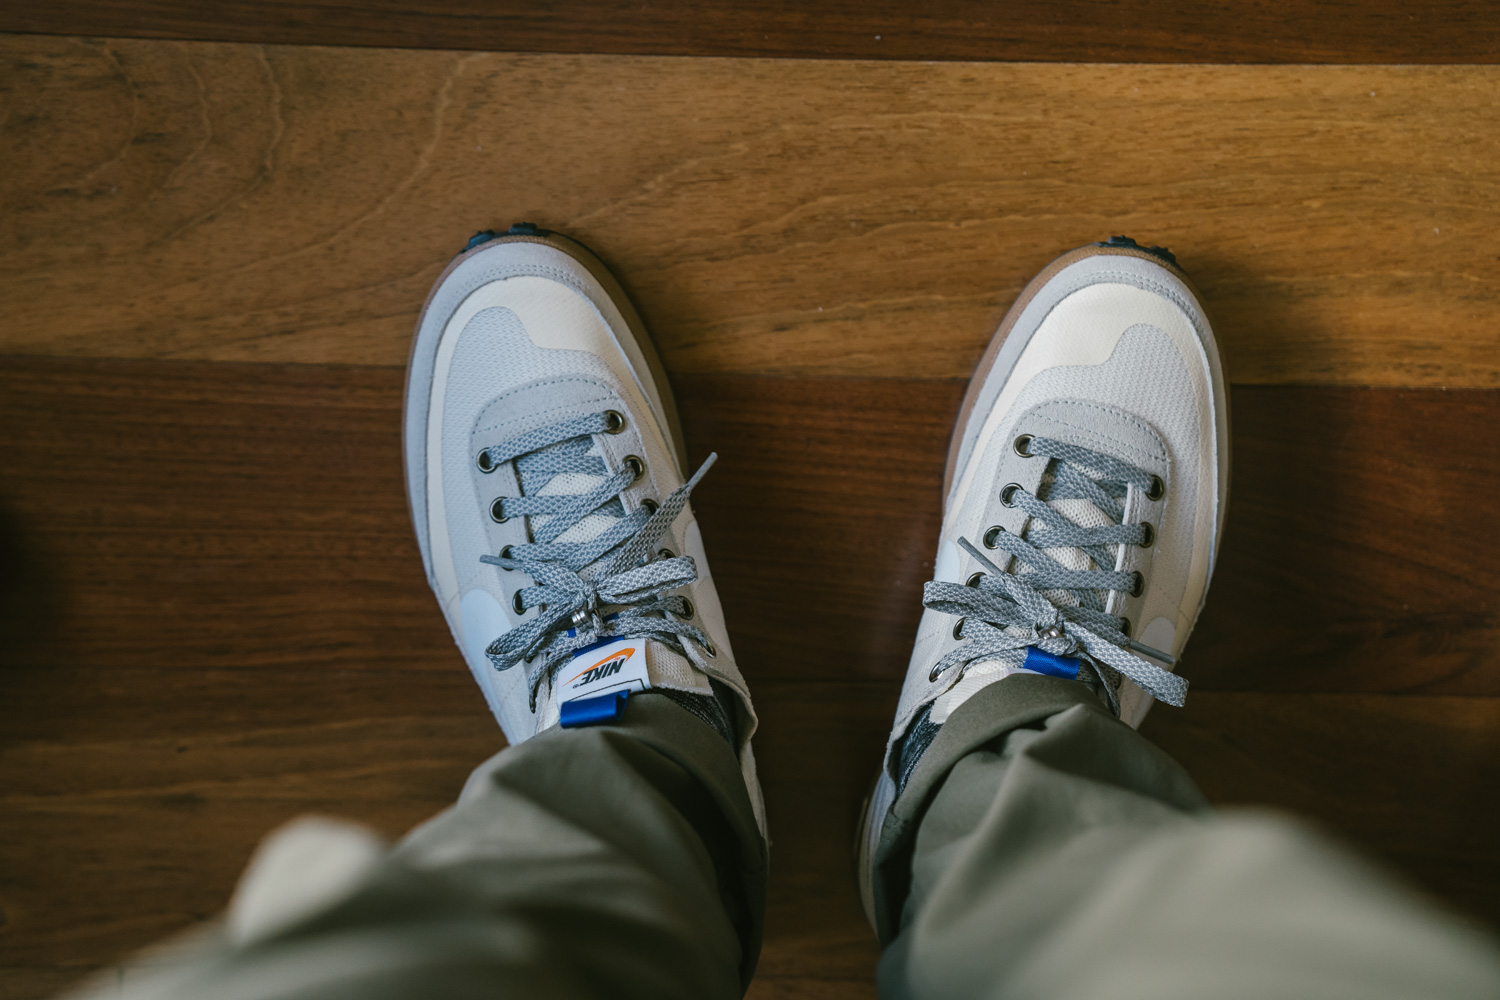
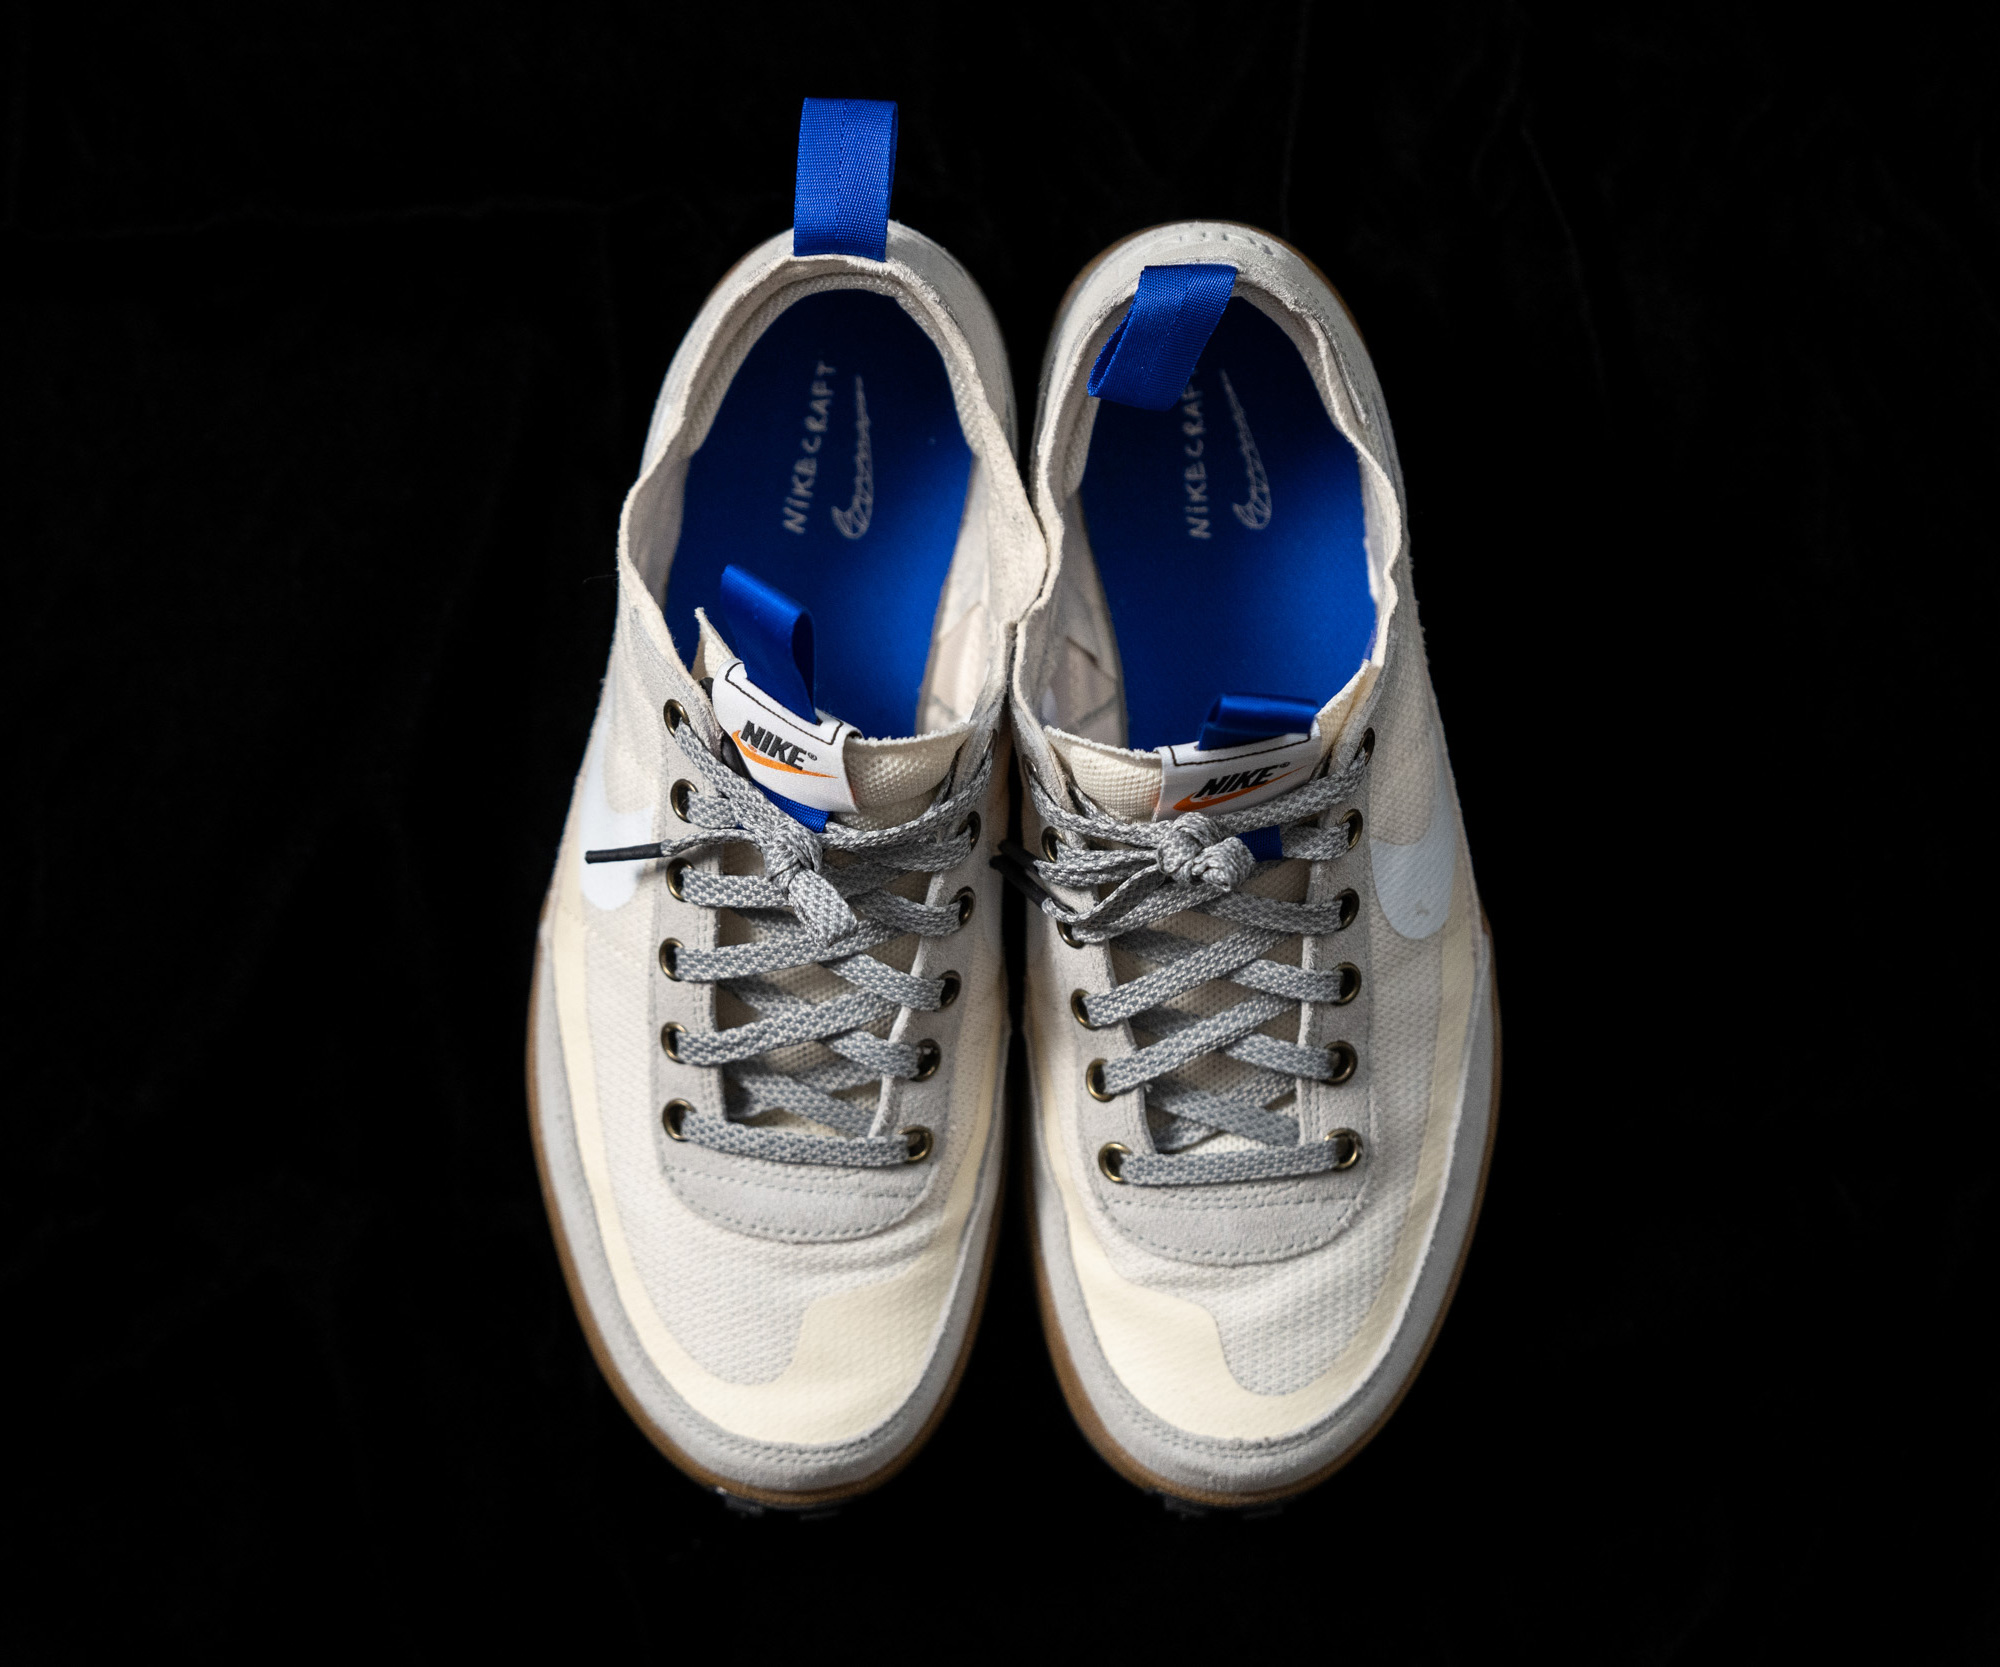
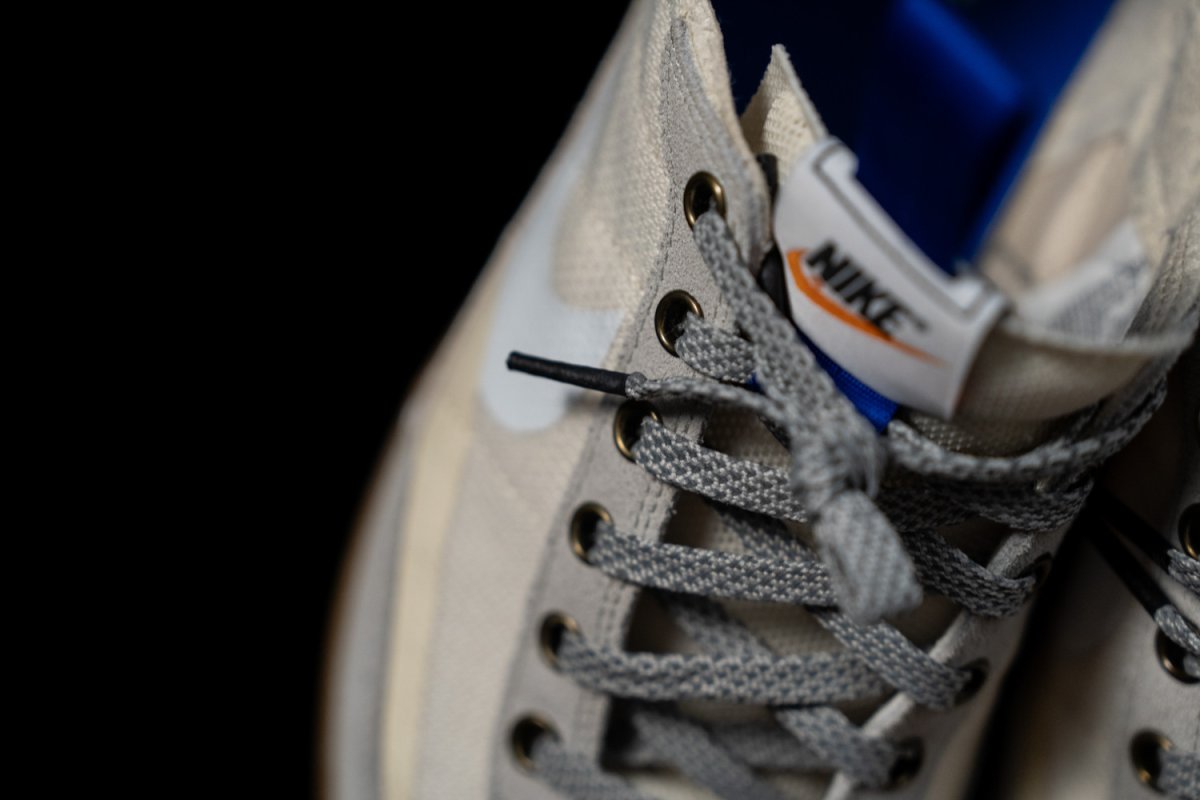
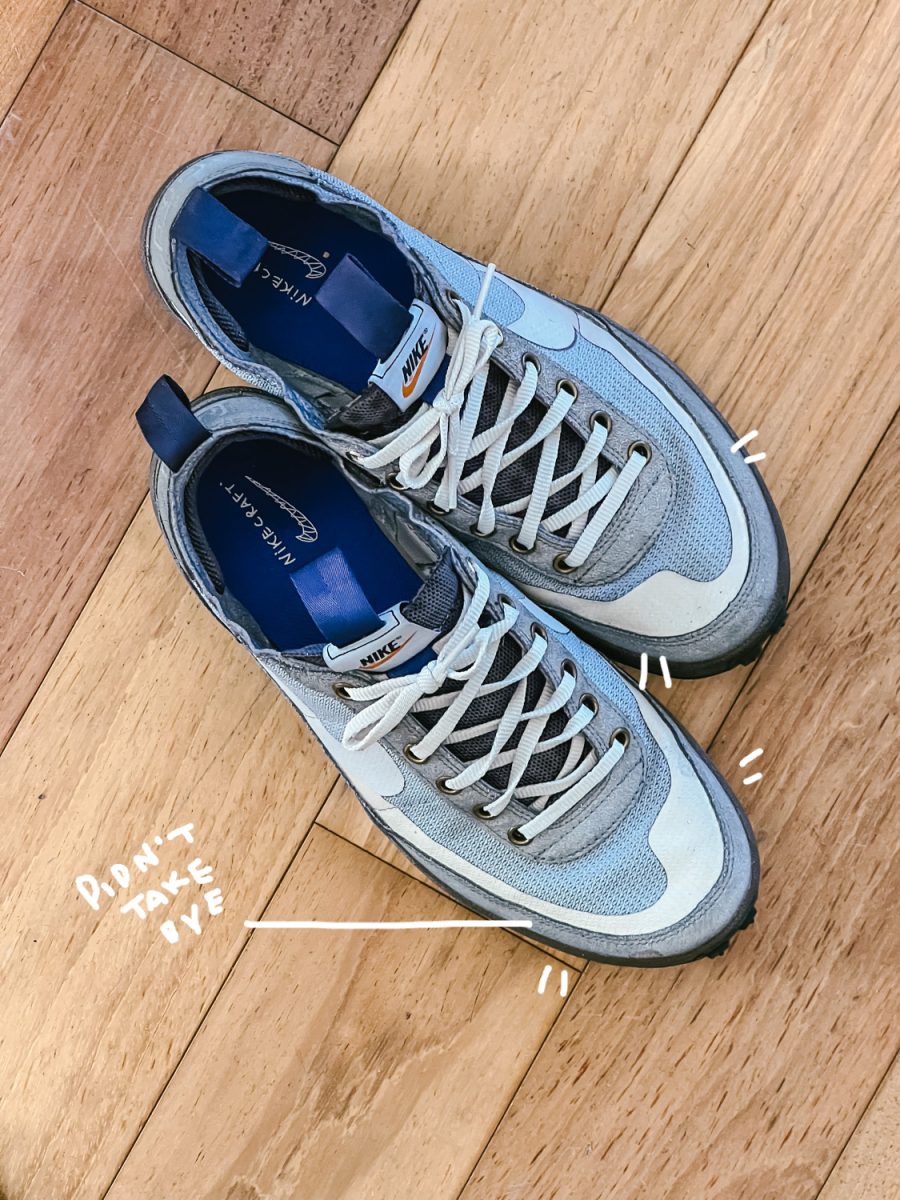
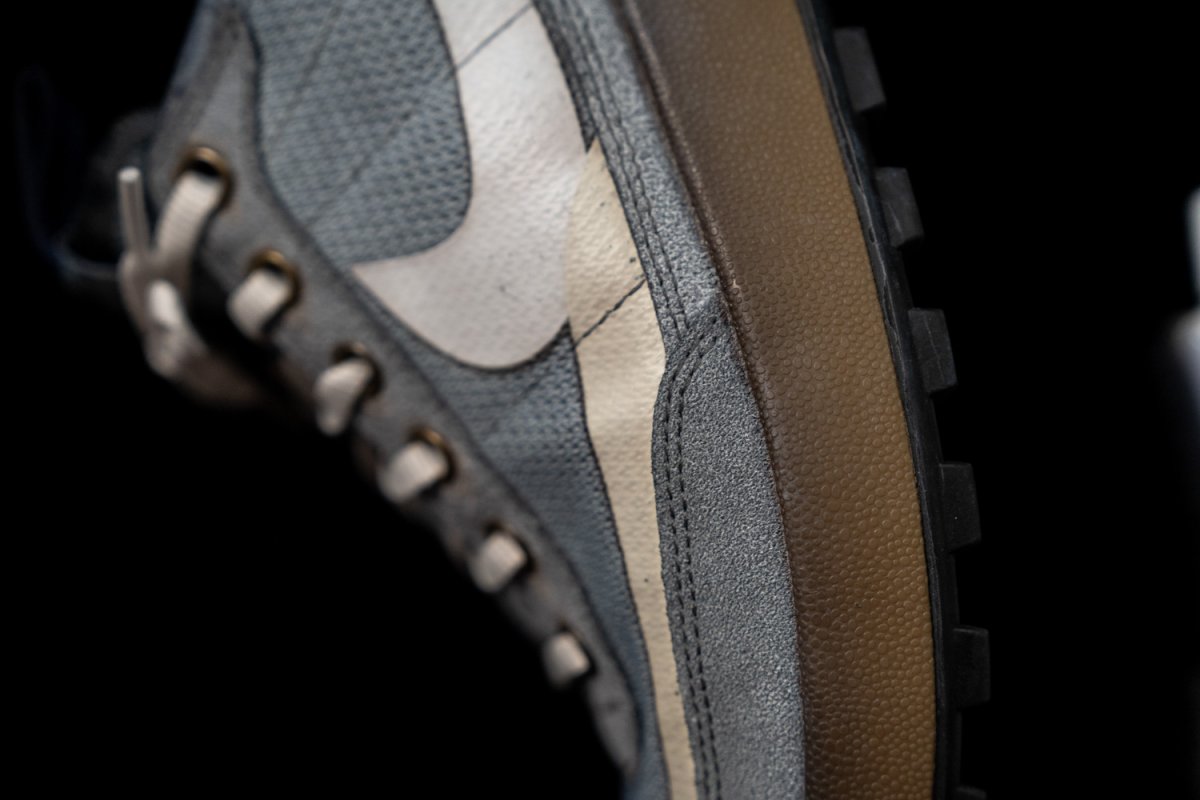
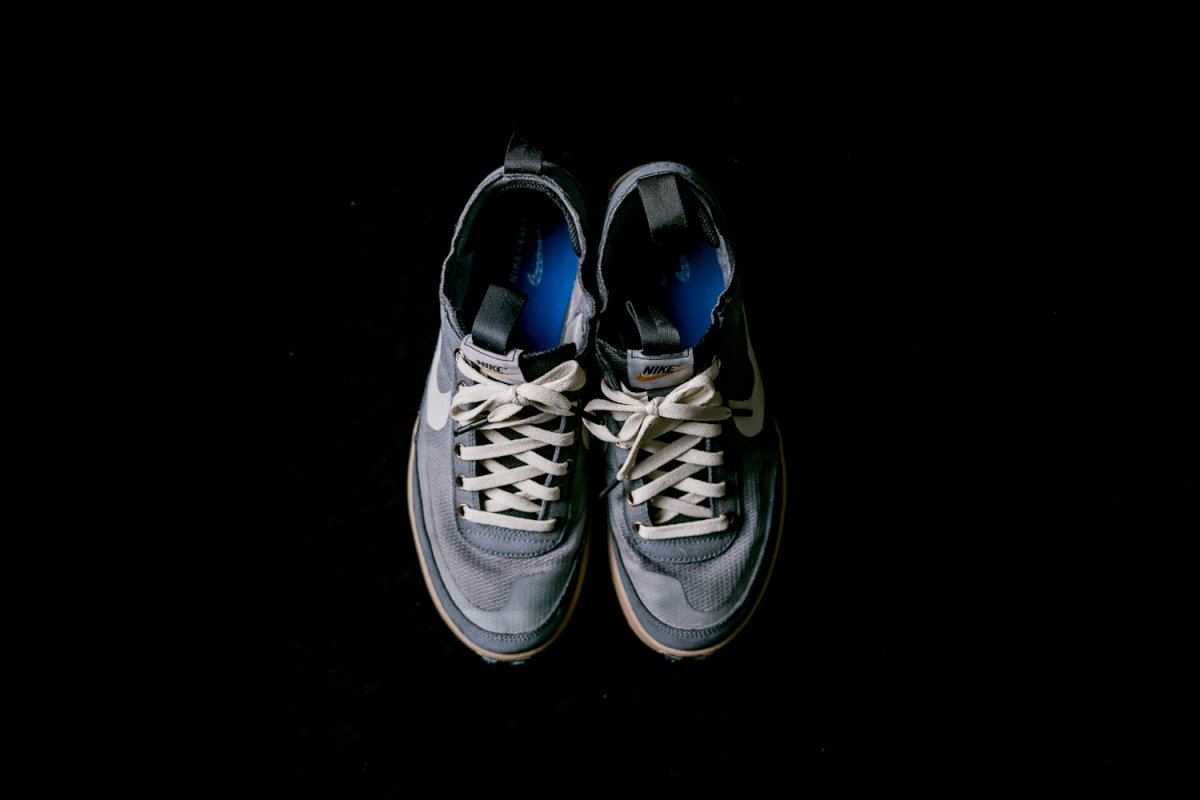
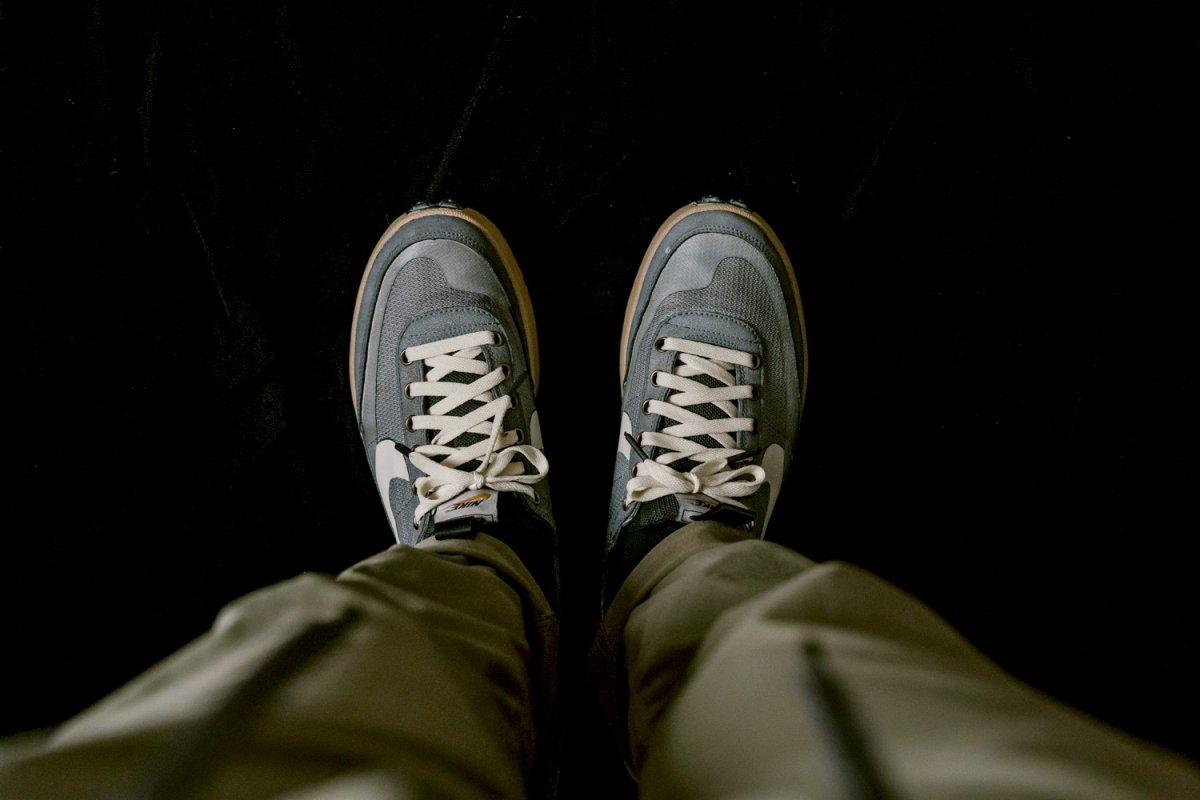
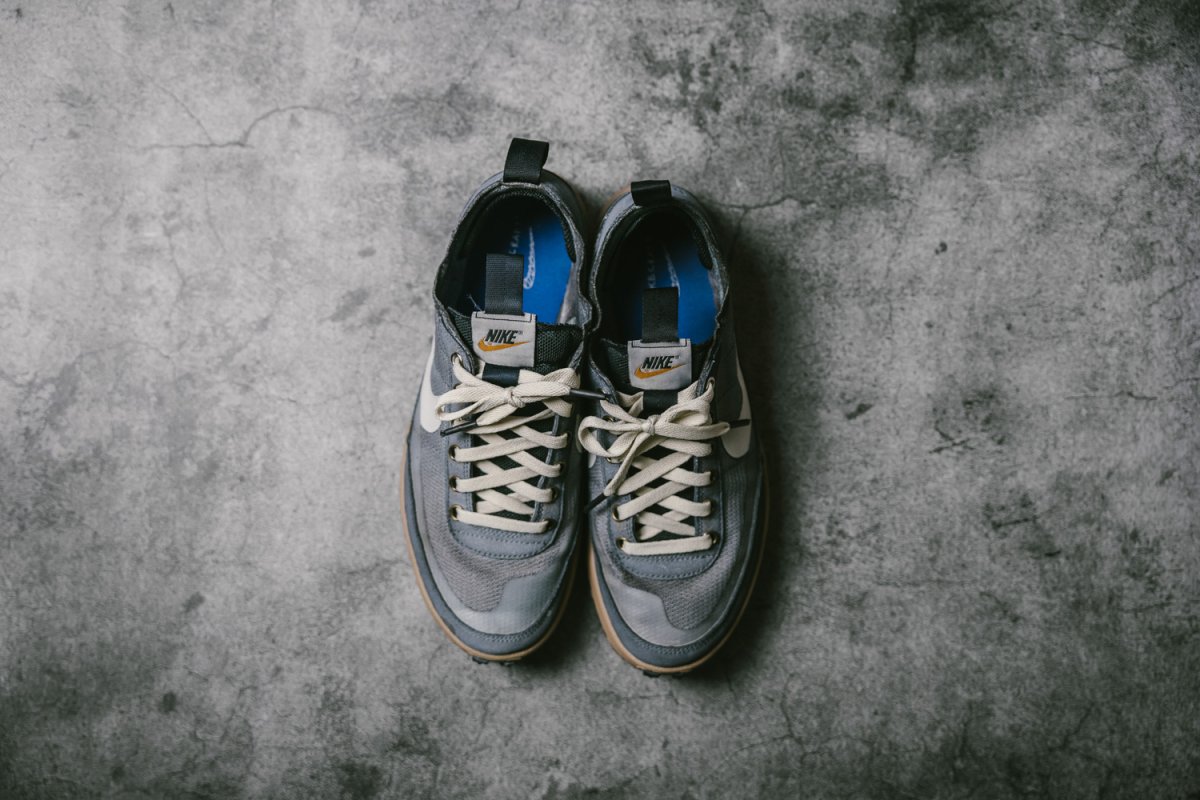
Laces & Grommets
I swapped in cream laces for contrast and sealing lace ends with shrink tubing for a small black accent. I also reinstalled the antique grommets from Phase 1.
Swoosh
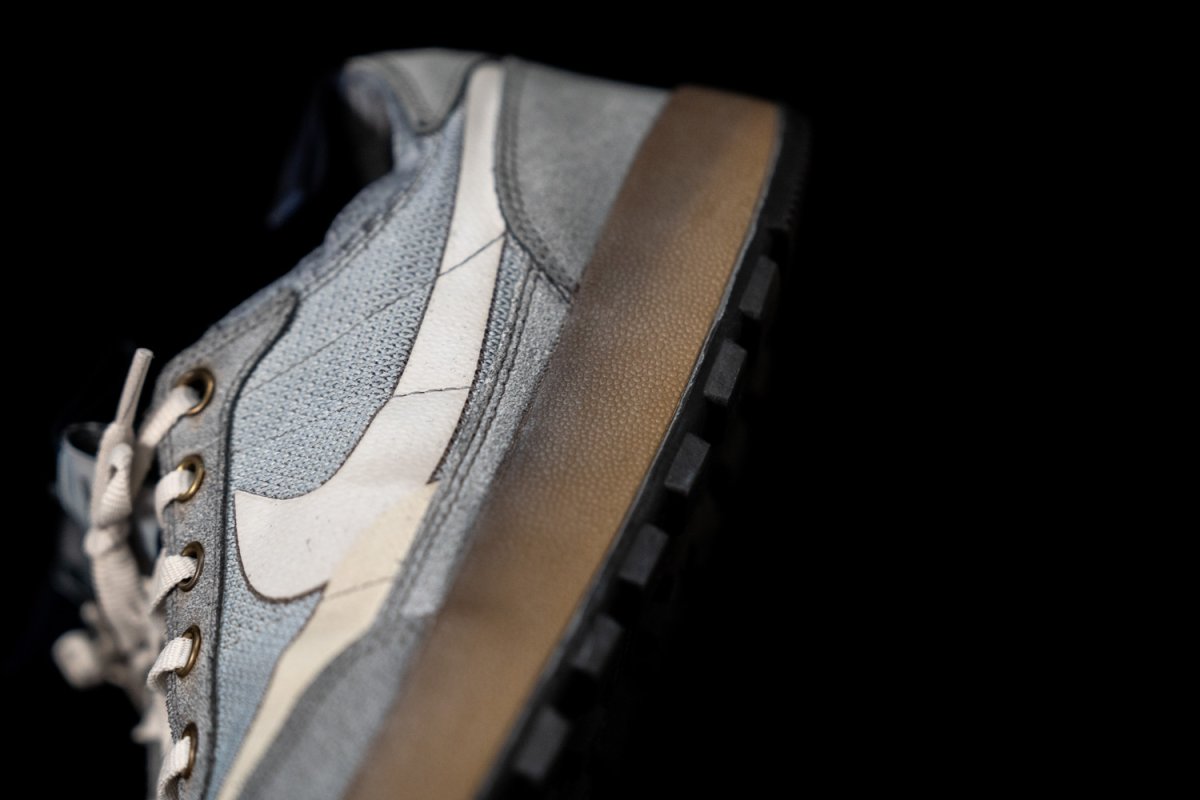
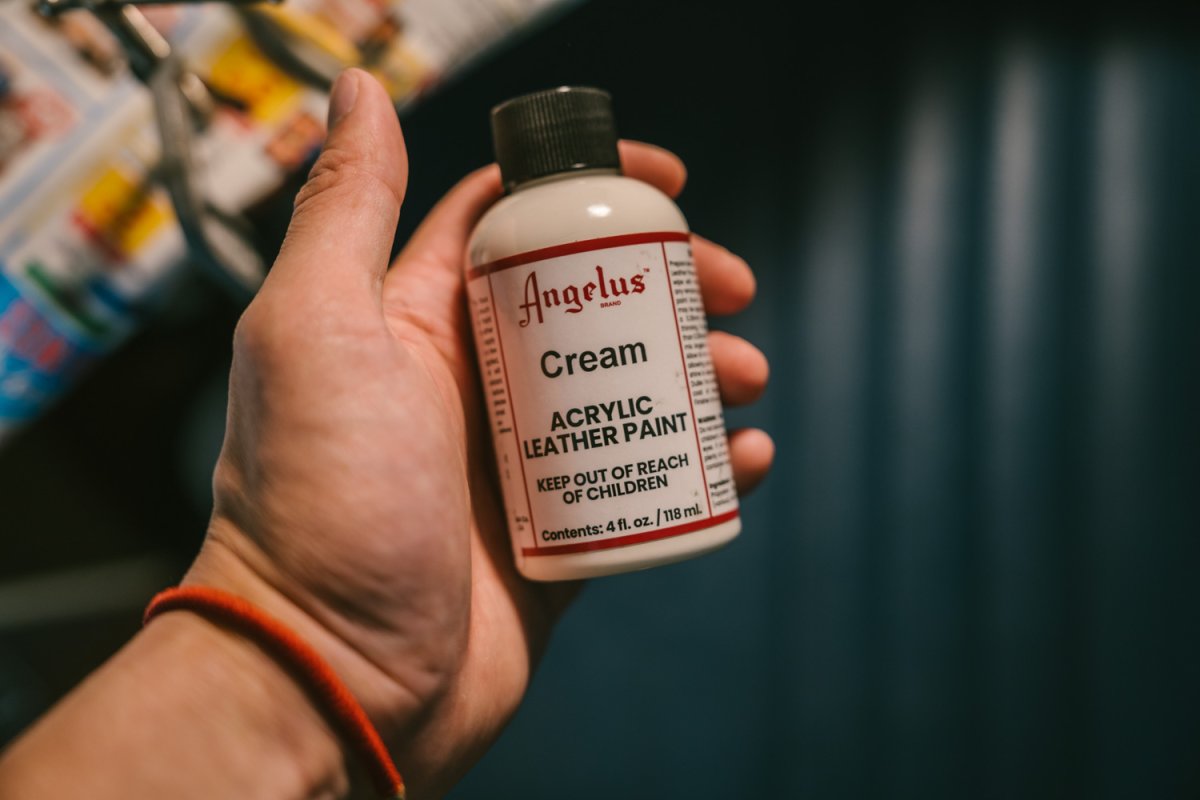
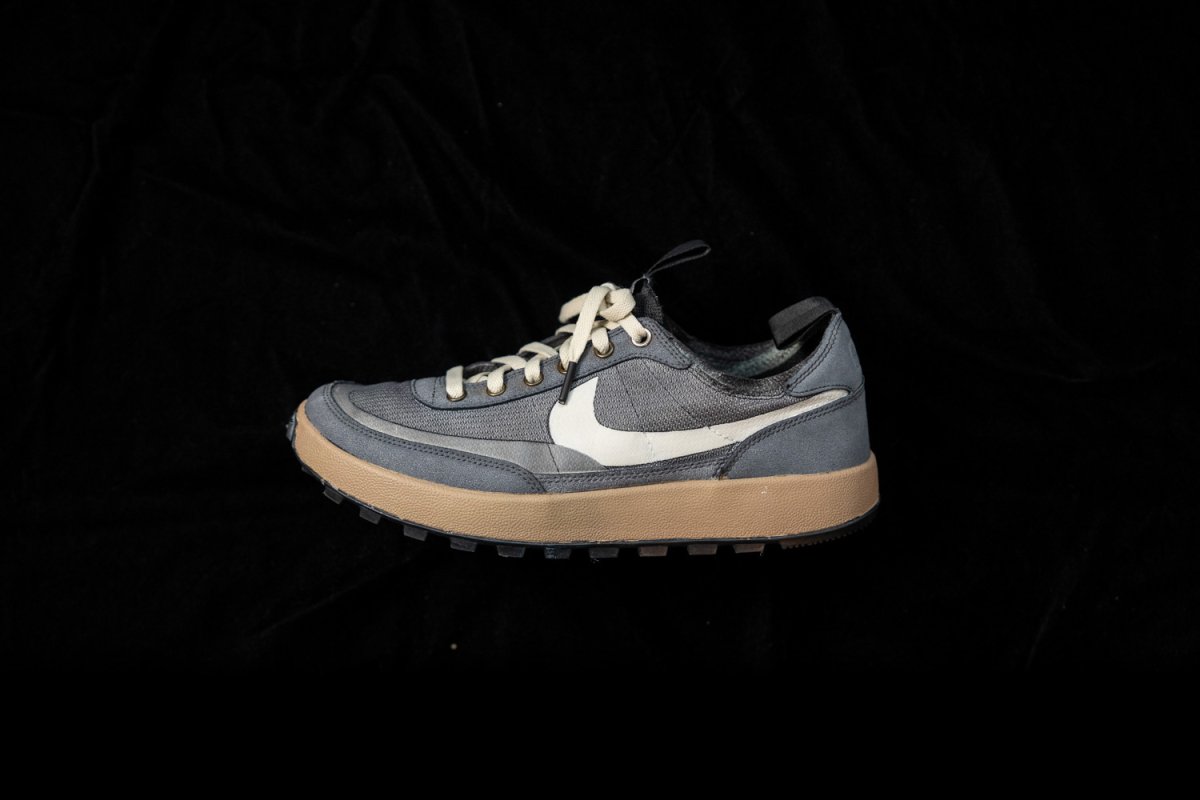
The swoosh color was beyond saving, so I repainted it in a vintage cream tone — subtle, but clean.
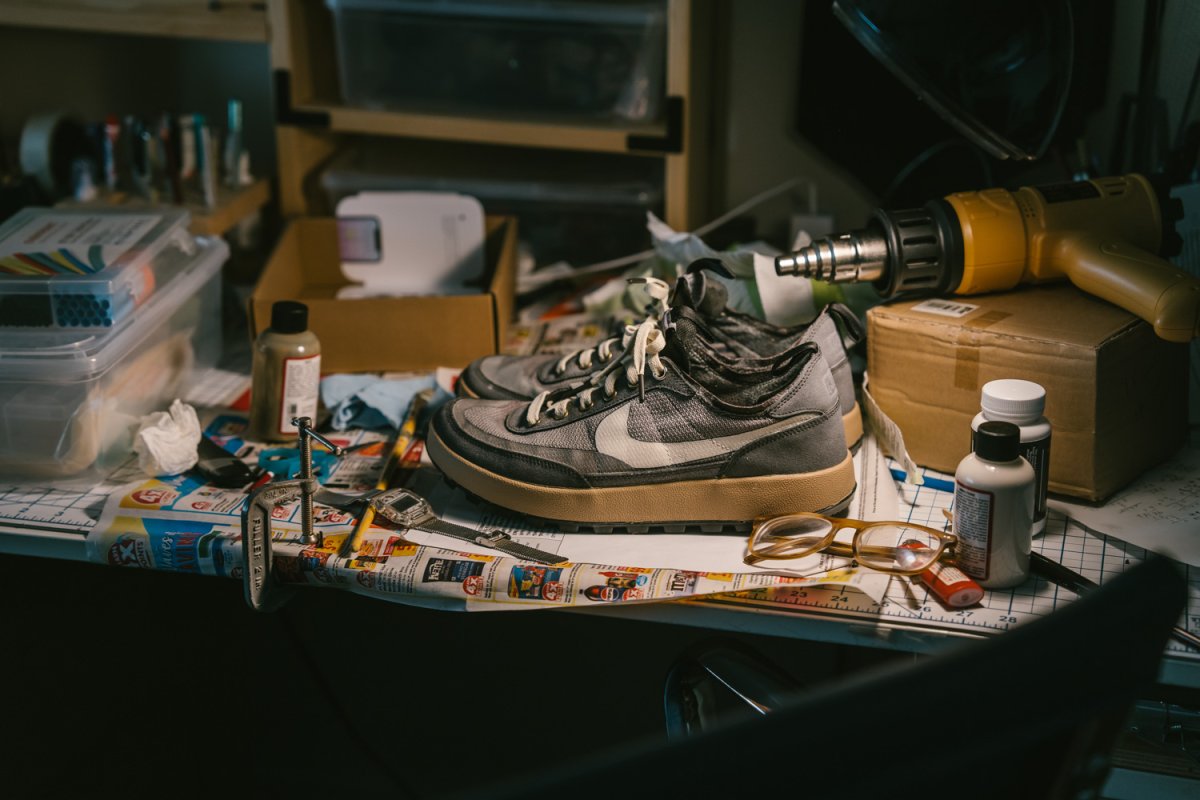
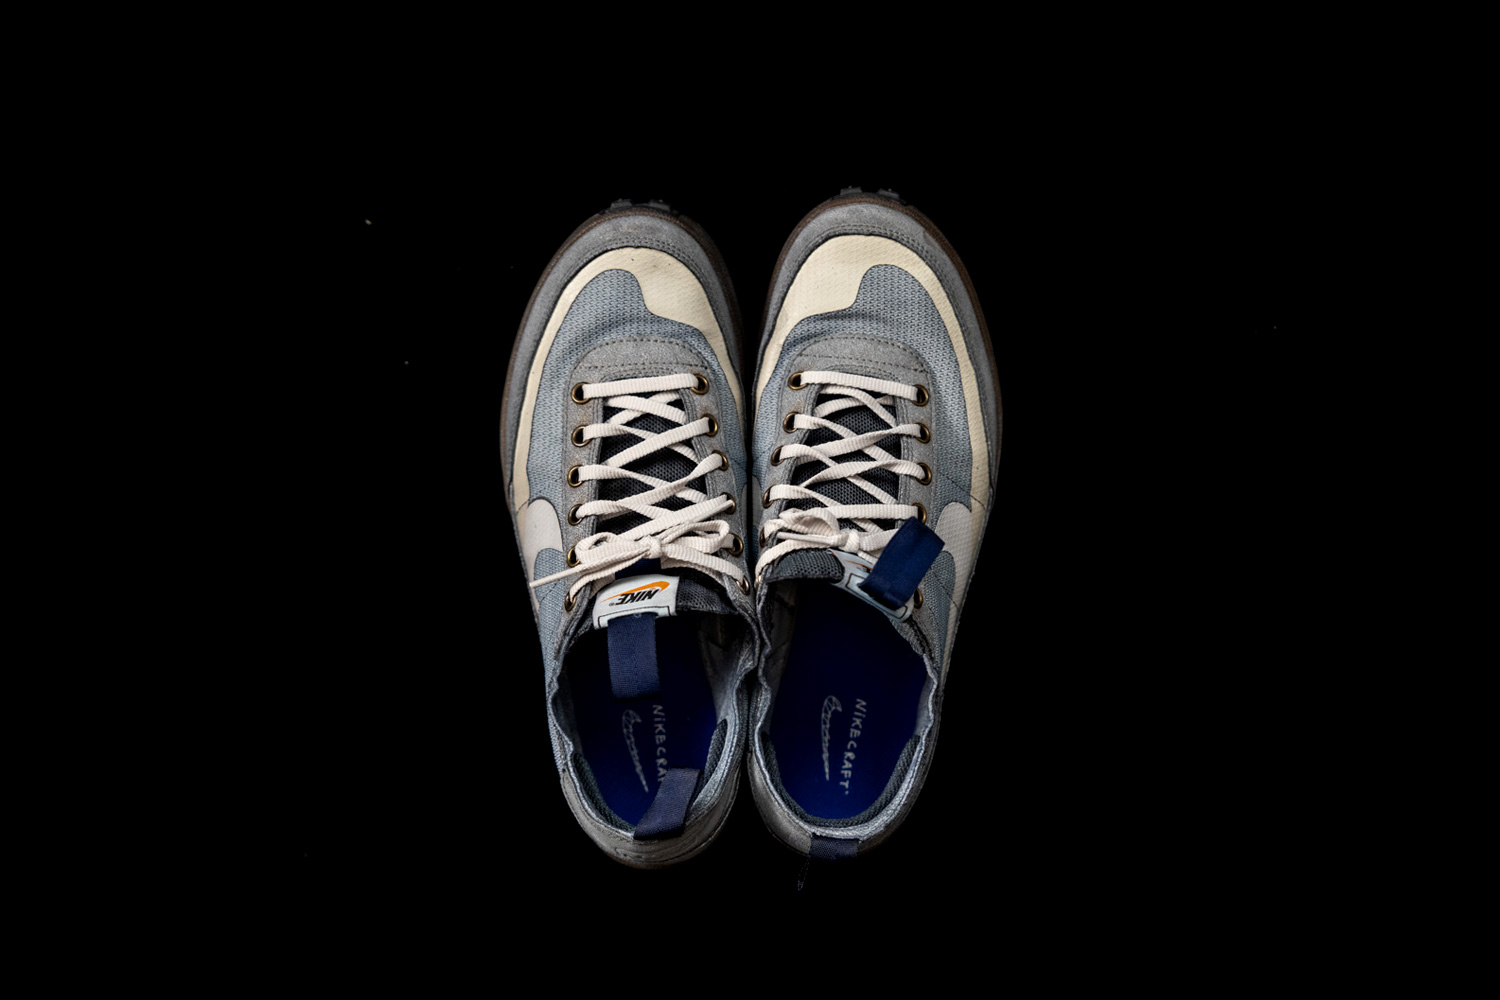
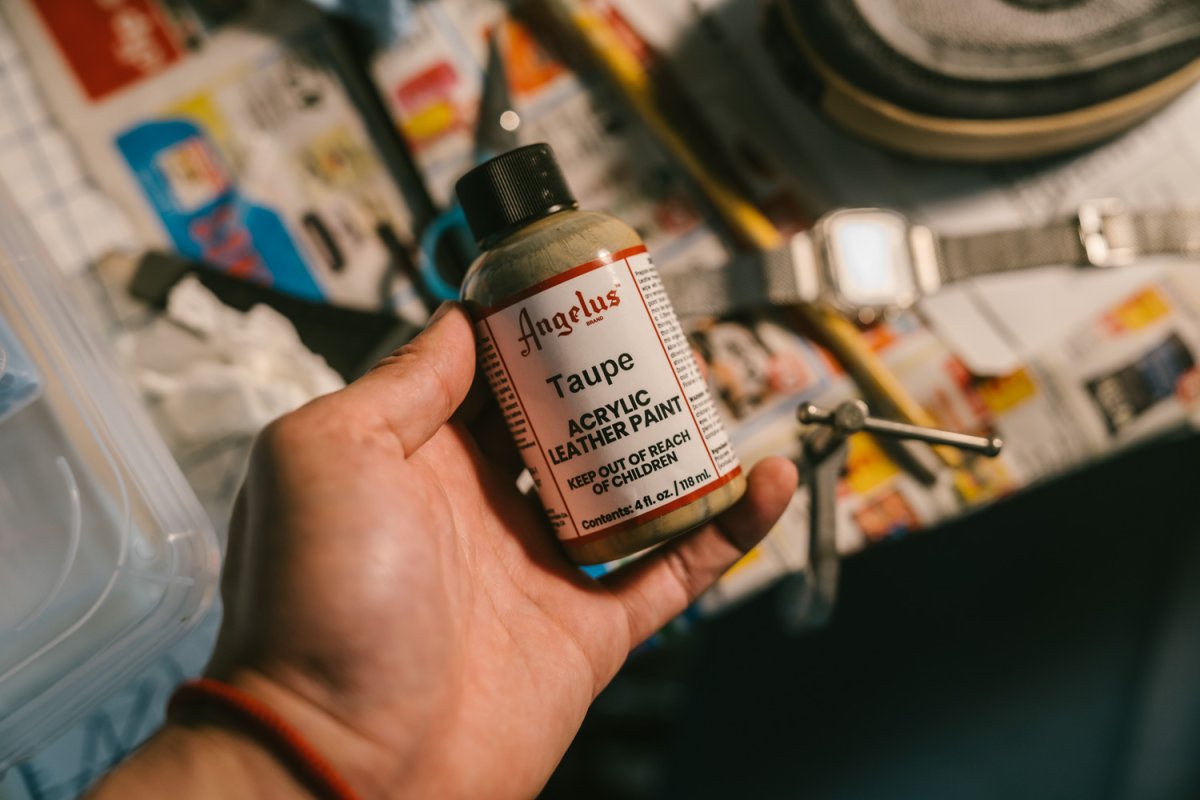
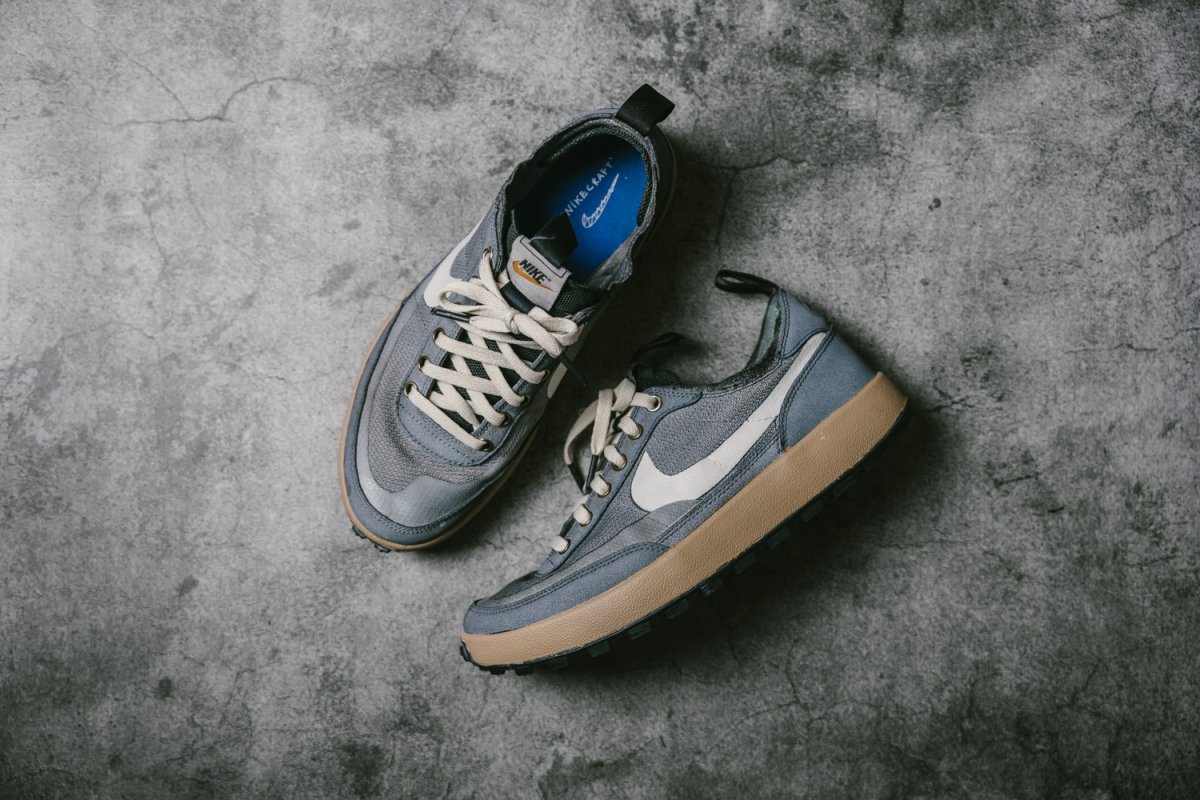
Soles
I loved the original sole color, so I tried to recreate it using Angelus Taupe paint. The challenge: most paints crack after wear. After testing several methods (including adhesive primer and multiple acrylic layers), the best result came from mixing FX Paint (flexible) and Angelus acrylic paint in a 1:1 ratio, applying 2–3 thin layers. It mostly eliminated cracking — though scuffs still happen relatively easily.

Acceptance
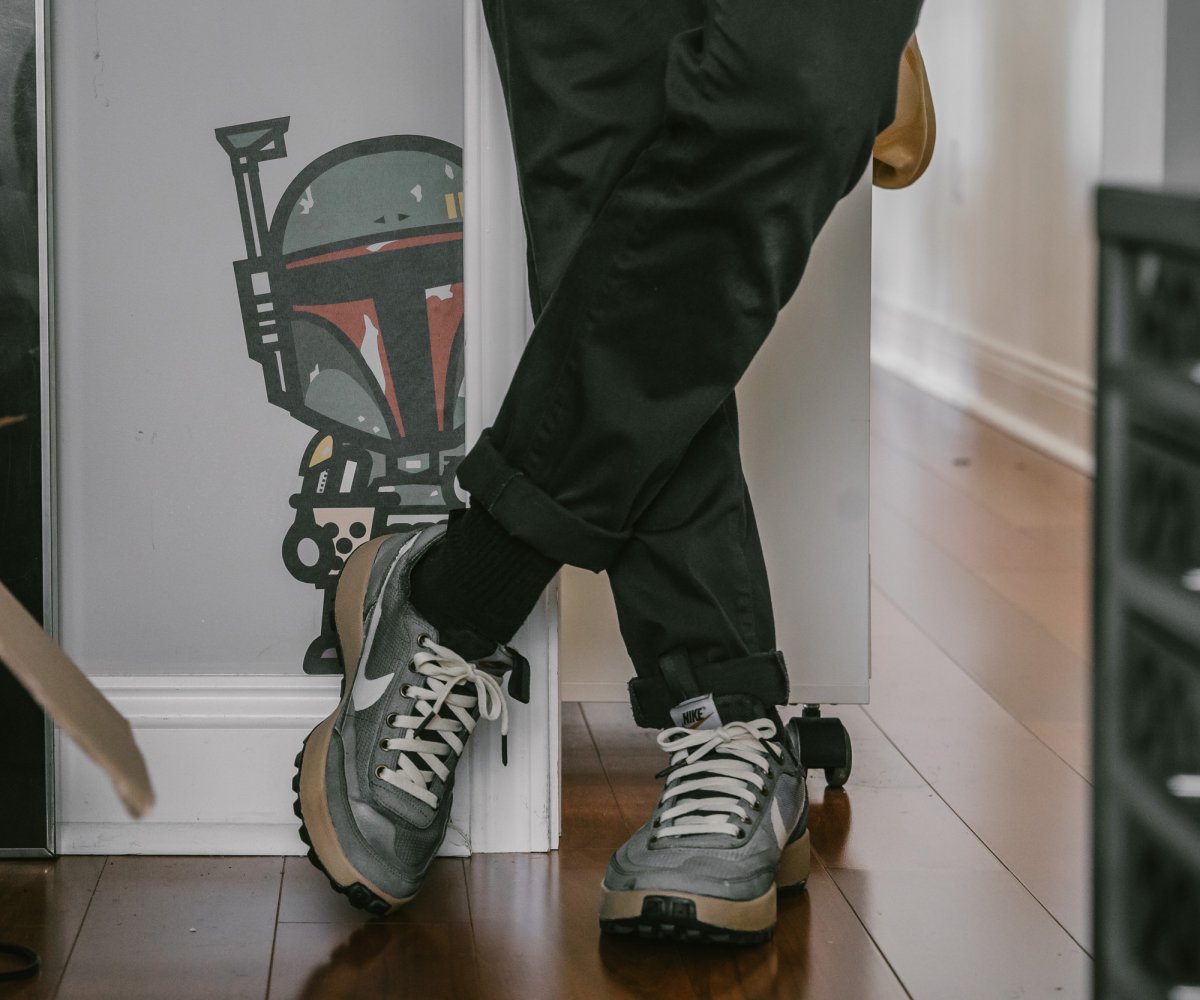
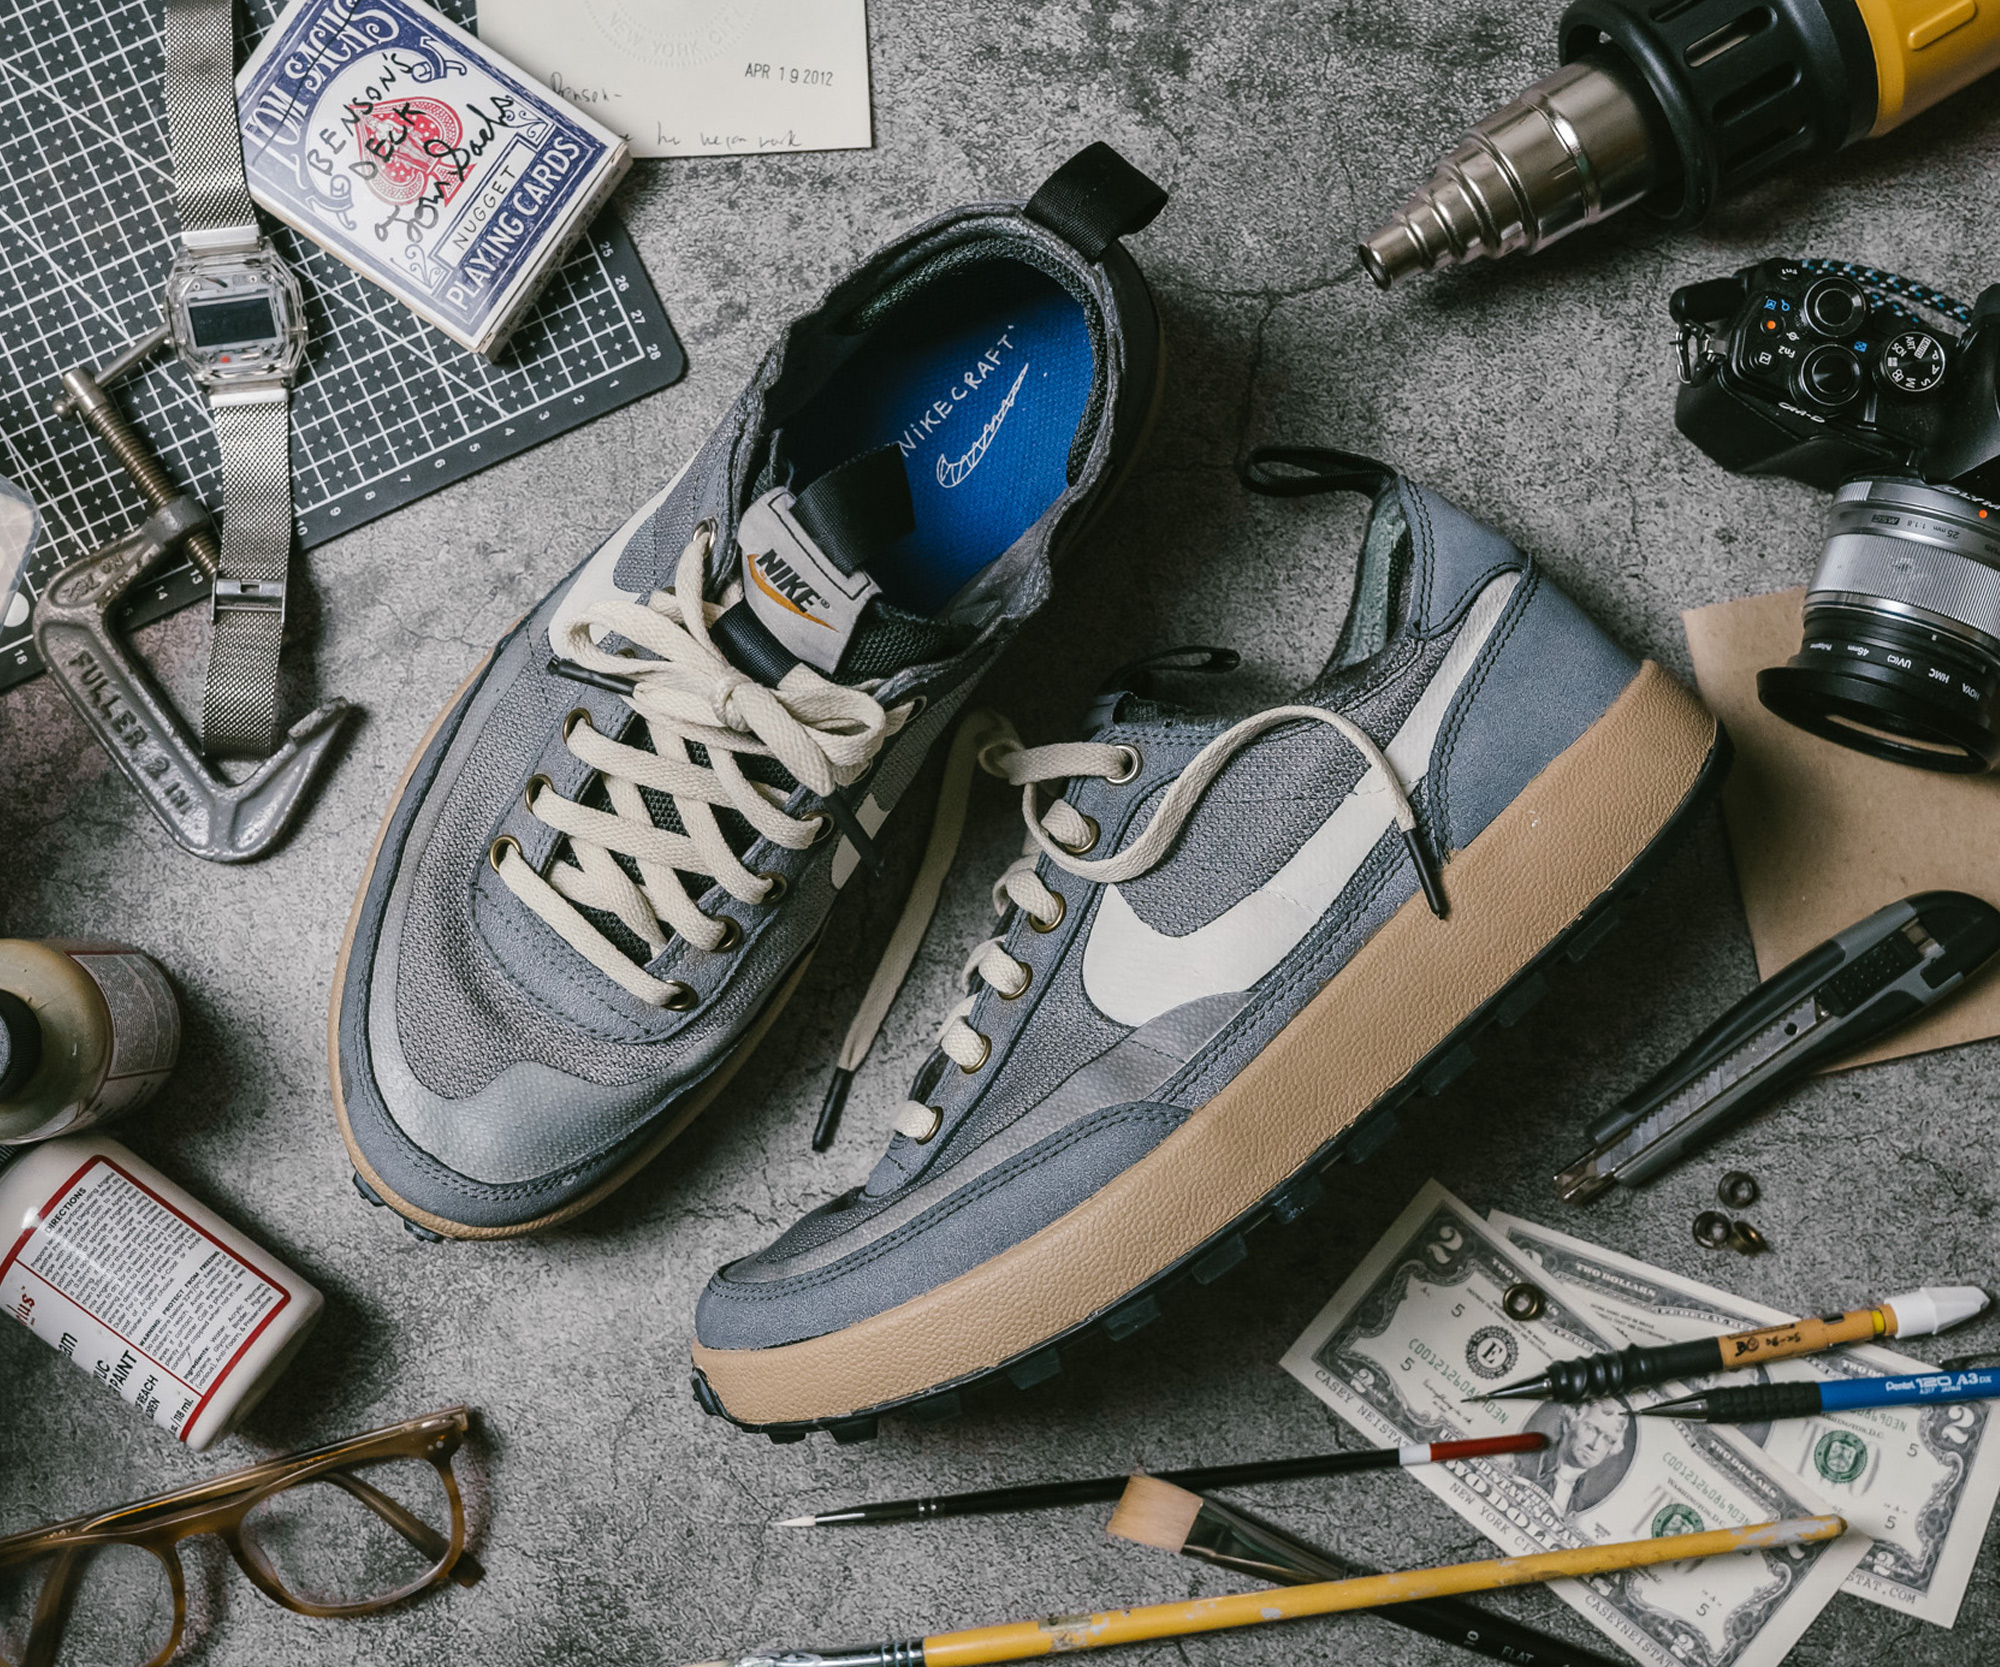
The final color isn’t what I had envisioned. But through the chaos, I developed a real appreciation for this pair.
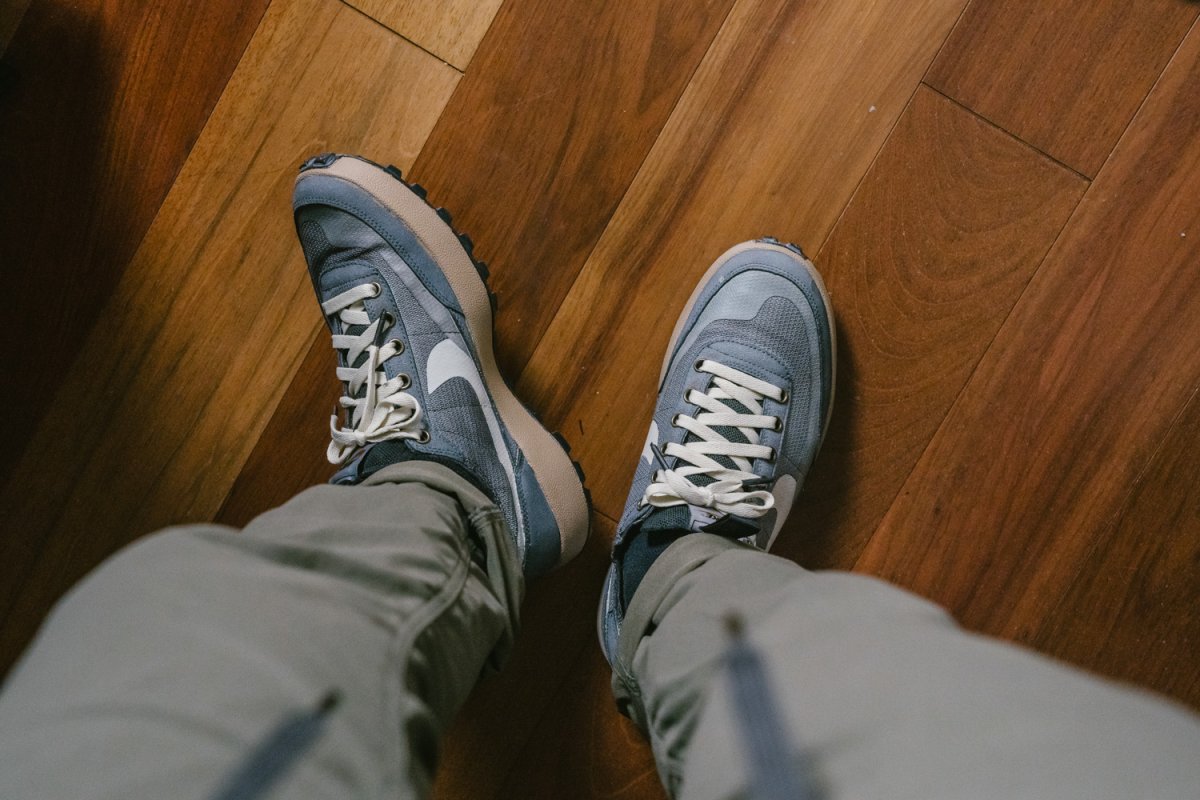
It’s imperfect — but that’s what makes it mine. The flaws remind me that things rarely go perfectly, and sometimes what starts as a failure becomes the feature.
Memento
The significant object(s) from the trip.
Part of a collection by MomentsArchive™
This 1-of-1 Tom Sachs General Purpose Shoes custom went through absolute chaos. I nearly decided to toss this pair away due to how awful it looked at one point. Glad I stuck with it, and it’s become one of my favorite customs.
